


Zucchini Fries with Homemade Pesto Hummus!
Technically this recipe is, in fact, TWO recipes in one, but the ingredients overlap so much and let’s face it, who doesn’t want some amazing homemade pesto hummus to have on hand, even if you don’t eat it all with these fries…? (Side note: I didn’t eat it all, either but I ended up using the rest the following day in another dish…so keep your eyes peeled for that post soon!)
Technically this recipe is, in fact, TWO recipes in one, but the ingredients overlap so much and let’s face it, who doesn’t want some amazing homemade pesto hummus to have on hand, even if you don’t eat it all with these fries…? (Side note: I didn’t eat it all, either but I ended up using the rest the following day in another dish…so keep your eyes peeled for that post soon!)
My bestie is on her own health journey these days. She's not necessarily plant-based but every now and then I can woo her over to the green side for a bit...like this week when she texted me that she was making zucchini fries! Her recipe called for egg whites but I knew I could probably pull off essentially the same thing with some aquafaba AND since I would be opening a can of chickpeas anyway homemade hummus to dip them in just seemed like the obvious choice!


What you are going to need to buy:
Zucchini - quantity is going to just depend on how many fries you want. What you see pictured is one medium zucchini and I gobbled them all up myself, so…make your best choices!
One can of Chickpeas
Minced Garlic - (we like these jarred options from Spice World!)
Bread Crumbs (I ended up using my own because I had some crutons that I had made from some leftover sourdough bread…but any will work. Use traditional Japanese Panko for a vegan version!)
Italian Seasoning
Nutritional Yeast - (If you don’t care about this recipe being vegan, you can use some powdered parmesan.)
Garlic Powder (Yes, there is fresh garlic and powdered garlic in this recipe. Don’t judge)
Onion Powder
Paprika
Salt & Pepper, to taste
Lemon Juice
Basil (and/or Italian Parsley)
Olive Oil
What you are going to need to do:
Let’s start with the Zucchini Fries!
Preheat over to 400 degrees.
Open the can of chickpeas and drain, reserving the liquid.
In a small bowl toss 1/4 cup of the chickpeas with 1/2 teaspoon of garlic powder, onion powder, paprika, salt, and pepper, until fully coated.
Place chickpeas on a baking tray with a silicone mat or lined with baking paper.
Cut your zucchini into your prefered “fry” sized pieces. I will say that, in the end I did prefer the thinner fries because they were crispier.
With a stand mixer or traditional hand mixer, whip the liquid from the chickpeas (called aquafaba) until light and and fluffy (resembling whipped egg whites) - This can take several minutes.
In a shallow dish or a rimmed plate mix together bread crumbs, Italian seasoning, nutritional yeast, garlic powder, onion powder, paprika, salt, and pepper. (Quantities will vary based on how many fries you are making. Don’t stress out…this is hard to really mess up.)
Dip the zucchini fries into the whipped aquafaba making sure to fully coat and then coat with the breadcrumb mixture. Continue until all fries are coated.
Bake at 400 for 20 minutes, flipping 1/2 through cooking.
Okay, onto the HUMMUS and PESTO!
While the chickpeas and the fries are in the oven you can make the hummus!
Into a blender dump the rest of the chickpeas along with 3 tablespoons of oil, 2 tablespoons of minced garlic (along with a little of the oil that the garlic is paked in…yum!), the juice of one lemon (or a couple tablespoons of white cooking vinegar.)
Blend until smooth adding additional oil, or even some of the whipped aquafaba, until your desired consistency is achieved.
Dump…scrape… or otherwise evacuate your hummus from the blender into a bowl. Get out all you can but don’t be too picky about it. No need to rinse the blender.
Back into the blender add 1 to 1.5 cups of fresh basil (and other greens of your choice) with 3-4 tablespoons of oil, salt, pepper, and a squeeze of lemon juice. Blend until the herbs are broken down but not completely smooth.
Back to the fries…
You can, for the last 2 minutes, turn your oven from bake to broil to get some nice toasted color on your fries but watch this carefully. Every oven is different and you don’t want them to burn!
Let fries cool on the tray for 2-3 minutes before serving.
Serve fries with pesto that you have swirled into the hummus…and garnished with the roasted chickpeas!
(Try not to eat the entire plate yourself)
Enjoy!

Healthy Chocolate Oatmilk Ice Cream - Only 5 Ingredients!
Not only is this Chocolate Oatmilk Ice Cream the one of the simplest summer recipes to make it also sneaks in an extra serving of veggies into your favorite summer snack by using avocados to make it extra creamy and dreamy! Only using 5 ingredients, most of which you probably alfready have in the house…it’s perfect for the kiddos because when it warms up it gets soft but never really "melts" making it much less of a mess for little mouths!
It's National Oat Milk Week and I'm celebrating with my friends over at Rise Brewing Co. using their Organic Chocolate Oatmilk to make this 5 ingredient dairy free ice cream!
Not only is this the one of the simplest summer recipes to make it also sneaks in an extra serving of veggies into your favorite summer snack by using avocados to make it extra creamy and dreamy!


Easily double or triple the recipe to serve a crowd. It's perfect for the kiddos because when it warms up it gets soft but never really "melts" making it much less of a mess for little mouths! Will definitely be serving this next weekend for Memorial Day!

Healthy Chocolate Oatmilk Ice Cream
Author: Sarah | April 19, 2021
Servings: 2-4
prep time: 15 minutes
freeze time: 3 hours - Overnight
total time: 8 hours
Ingredients: What You need to buy!
1 ripe avocado
1/4 c. Chocolate Oatmilk from Rise Brewing Co.
1/4 c. Cocoa Powder
3 tablespoons of Maple Syrup
Mini Chocolate Chips
Instructions: What You need to do!
Blend avocado, oatmilk, cocoa powder, and maple syrup until smooth.
Add a handful of chocolate chips and stir to combine
Freeze for 3 hours or up to overnight in a coverd bowl.
Serve with your favorite dairy free topping!
And…that’s it! See, I told you it was easy! Another of my favorite ways to enjoy this nice-cream is to make coffee floats! Simply use your favorite cold brew coffee, like the Nitro Original Black from the Rise Brewing Co. in place of root beer and top with a scoop of ice cream!
This recipe also happens to be the fastest and yummiest way to make dairy-free chocolate pudding! Simply skip the freezing step and refrigerate for about 30 minutes before serving! I really hope that you’ll try this Healthy Chocolate Oatmilk Ice Cream with Only 5 Ingredients this summer…and make sure to tag me when you do! @plantbasedgingr
Love, Light, and Lentils, my friends!
Sarah

Corn'd Beef Sandwich with Quick Pickl'd Collard Greens
While collard greens might not be the traditional way to top a corn'd beef sandwich, the fibrous texture of collards makes them the perfect green to pickle. Unlike some other, more delicate greens, collards are easily able to retain their texture and bring a
While collard greens might not be the traditional way to top a corn'd beef sandwich, the fibrous texture of collards makes them the perfect green to pickle. Unlike some other, more delicate greens, collards are easily able to retain their texture and bring a delicious sweet and tangy crunch that pairs perfectly with the salty corn'd beef of this famous sandwich.


Irish or not, we promise that it's so good, you'll definitely want to kiss someone! The best part? You can store these Quick Pickl'd Collard Greens in the fridge for up to a month!

Corn'd Beef Sandwich with Quick Pickl'd Collard Greens
Author: Sarah | April 19, 2021
Servings: 4
prep time: 15 minutes
cook time: 8 hours - Overnight
total time: 24 hours
Ingredients: What You need to buy!
2 c. of Palmetto Greens chopped collard greens, think the texture you'd use for the cabbage in coleslaw.
1/2 medium, white onion, diced
1 t. salt
1 t. black pepper
2 tsp. minced garlic
1 t. dill seeds
1 t. fennel seeds
1/2 c. white vinegar
1/2 c. of maple syrup
Ingredients: To make the Sandwich
Seeded Sourdough Bread
Dairy-Free Cream Cheese
Vegan Corn'd Beef
Quick Pickles Collard Greens
Dairy-Free Thousand Island Dressing
Instructions: What You need to do!
Pack the chopped collard greens and diced onion into a mason jar and add all spices.
In a microwave-safe measuring cup, mix the vinegar and maple syrup, and heat for 1 minute, until hot.
Pour the hot liquid over the greens/onion mixture, seal, and shake to combine/mix well.
Refrigerate for a minimum of 60 minutes, up to overnight, before using.
Lightly toast two pieces of Seeded Sourdough Bread either in a hot skillet or traditional toaster
Spread Dairy-Free Cream Cheese onto the bottom piece of the Seeded Sourdough Bread.
Layer Corn'd Beef and top with a generous portion of the Quick Pickl'd Collard Greens.
Spread Thousand Island Dressing onto the second piece of bread and top the sandwich!
Seriously, since I made these Quick Pickl'd Collard Greens I have been eating them on everything! I hope that you’ll try this simple, spring, recipe! Trust me, you won’t be disappointed! I’d love to see your kitchen creations! Remember to tag me on IG @plantbasedgingr to keep in touch!
Love, Light, and Lentils, my friends!
Sarah

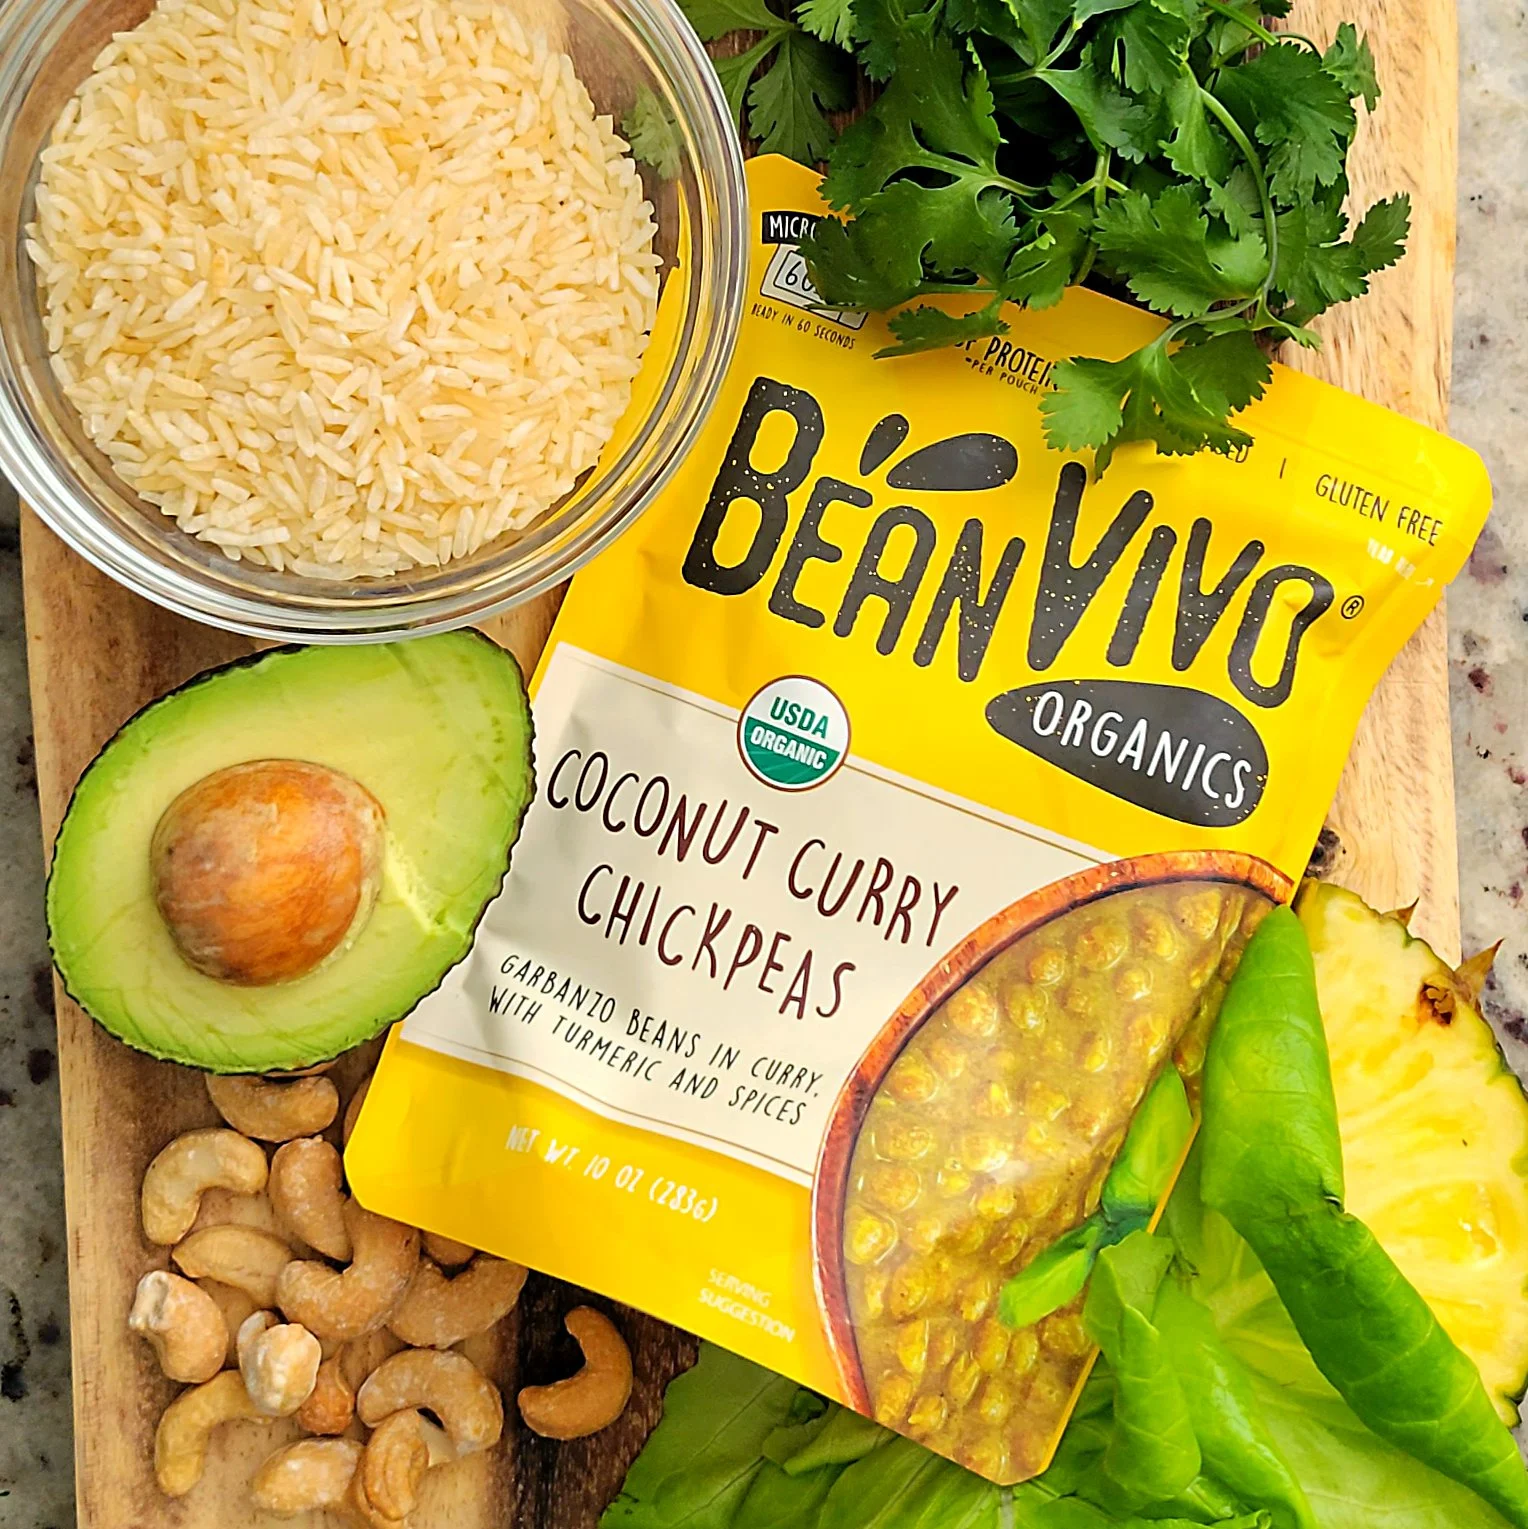
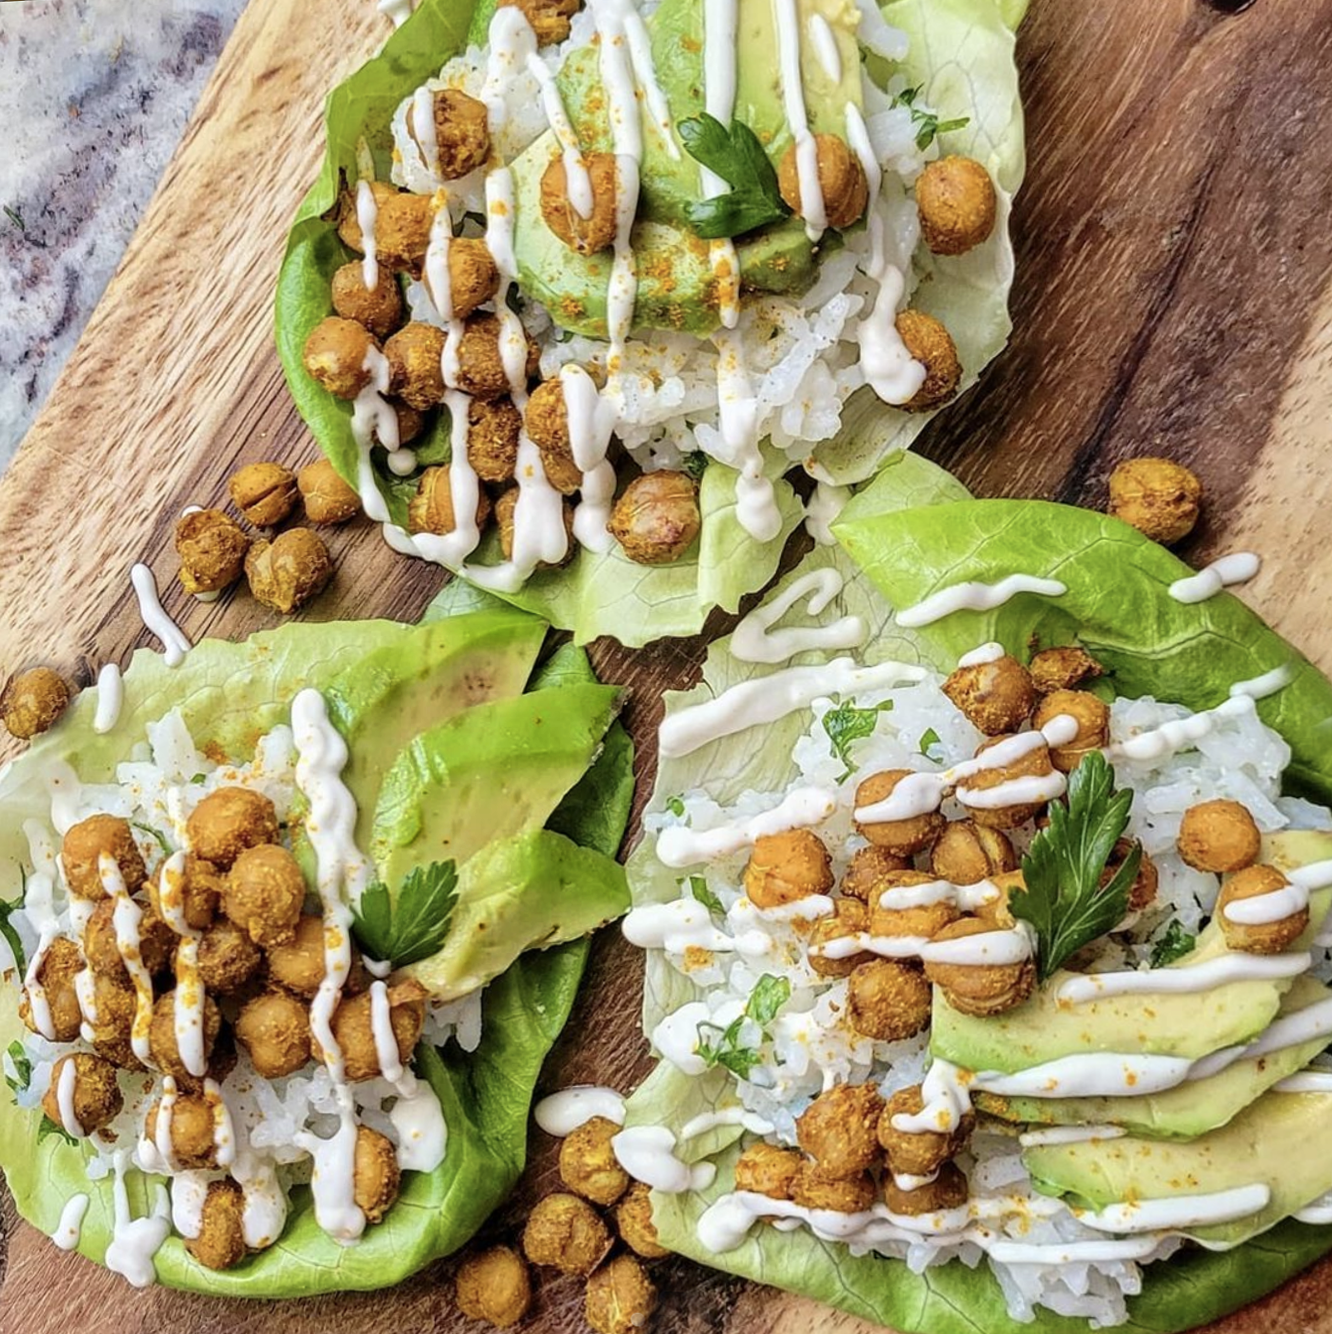
Coconut Curry Chickpea Lettuce Cups with BeanVivo!
If you are craving the flavors of curry but are short on time you are going to love these Curry Chickpea lettuce wraps! They are shockingly easy and even with roasting the chickpeas only take about 15 minutes to pull together with less than 10 ingredients that you probably already have in your panty! I used the lettuce as the “wrap” for this recipe but it would be equally as good wrapped in a tortilla or stuffed into a pita!
Are you ready for the easiest dinner you could whip together in 15 minutes with less than 10 ingredients? Thanks to our friends at BeanVivo these Coconut Curry Chickpea Lettuce Cups with with Cilantro Lime Rice and Pineapple are so simple to make and packed full flavor even the pickiest eaters in your house are sure to gobble them up!
If you’re not familiar with BeanVivo…you should be! Their mission was to develop tasty meals & snacks for people on-the-go, like you and me, by using simple organic ingredients. They combine one of nature’s most nutritious ingredients, not to mention one of my favorites, on our planet…beans, with tons of unique herbs and spices from around the world. Their ready to eat packs are sustainable, convenience (ready to eat in 60 seconds) and are totally gluten-free, and vegan! So…let’s cook!


What you are going to need to buy:
Lettuce, use your favorite…I like butter lettuce
One packet of Coconut Curry Chickpeas from BeanVivo
Minute Rice
Dairy Free Butter
Lime Juice
Fresh Cilantro, chopped fine (or parsley, if you must!)
Avocado
Chopped Pineapple
Cashews
What you are going to need to do:
To begin, prepare your rice per the boxed directions allowing about 1/4 cup of cooked rice for each serving (3 lettuce cups, per serving)
Once the rice is finished cooking, stir in 1 teaspoon of butter, and add lime juice and cilantro (To taste…I like mine really lime-y)
Open and slice one small avocado.
Slice fresh pineapple into 1/4 inch chunks
Open your packet of Coconut Curry Chickpeas from BeanVivo . The best part is that you don’t even need to heat them! They are super delicious, right out of the packet!
Assembly!
Using your lettuce as your “shell” spoon your Coconut Curry Chickpeas from BeanVivo on top of a bed of the cilantro lime rice. Add avocado, diced pineapple, and cashews!
See, told you it was easy! Check out all the delicious combinations of BeanVivo products at their website HERE!

Garlic Creamed Kale with a Parmesan Crust
Thanksgiving is right around the corner and while you might now typically think of kale as a food worthy of your holiday feasts, trust me, this recipe is going to win you over. A happy medium smack in the middle between a broccoli casserole and a green bean bake this unique side dish is packed with flavor the all the creamy goodness that you’re craving in your autumn inspired comfort foods!
Thanksgiving is right around the corner and while you might not typically think of kale as a food worthy of your holiday feasts, trust me, this recipe is going to win you over. A happy medium smack in the middle between a broccoli casserole and a green bean bake this unique side dish is packed with flavor the all the creamy goodness that you’re craving in your autumn inspired comfort foods!
One of the things that really upped my at-home cooking game in a big way was when I learned to master making a roux (pronounced rue)! Literally, the vault where all the soups and sauces you love are kept, is guarded by the culinary gatekeeper that is, roux. All it takes is a little butter and a little flour, some liquid and seasoning…once you get this down, you’ll never buy cream sauces or soups from the can or jar again. The cream sauce for this recipe is no exception and was literally whipped up with ingredients you probably already have in your pantry.


What you are going to need to buy:
Fresh Kale, about 4 cups, chopped into bite-sized pieces (1” - 2”)
4 tablespoons Minced Garlic - (we like these jarred options from Spice World!)
2 tablespoons of Flour
3 cups Original Oat Milk from Rise Brewing
4 tablespoons Butter - (We love THIS ONE from Earth Balance)
1/2 small white Onion, diced
1/2 cup of Vegan Mozzarella Cheese
1/2 cup Dairy Free Sour Cream
Salt and Pepper, to taste.
For the Crust/Topping
1/4 cup Bread Crumbs
1/4 cup Nutritional Yeast
1/4 cup of dairy free Parmesan
What you are going to need to do:
Preheat oven to 350 degrees.
To begin, in a high-walled skillet or saucepan, saute your onions and garlic with 3 tablespoons of butter until the onions are soft and have taken on just a little color.
Reduce heat to low and add another tablespoon of butter. Allow to melt.
Sprinkle 2 tablespoons of of flour over the top of the onions and the butter and with a large whisk, stir the flour into the onion until a paste is formed. Cook for 60 seconds and then gently add in 1 cup of oat milk, slowly, while you continue to whisk, so as not to get lumps.
Melt into mixture 1/2 cup of cream cheese and 1/2 cup of mozzarella cheese.
Stir in additional Oat Milk. You are looking for a consistency of a nice alfredo sauce.
Season to taste with salt and pepper.
If the sauce is too thin, allow to simmer until thickened. If the sauce seems too tick, add a little water.
Dump your chopped kale into the skillet and gently stir until combined.
Transfer your creamed kale to a small, oven safe, baking dish.
Top with your crust mixture that is equal parts bread crumbs, parmesan cheese, and nutritional yeast, spreading an even coat across the top of the baking dish.
Cover in foil and bake at 350 degrees for 20 minutes and then remove the foil and bake for another 10 minutes. Additionally, you can broil for a final 3-4 minutes so the top takes on nice color. (But watch it close so that it does not burn!)
Let sit for 10 minutes before serving.

Curry Chickpea Lettuce Wraps with Cilantro Lime Rice
If you are craving the flavors of curry but are short on time you are going to love these Curry Chickpea lettuce wraps! They are shockingly easy and even with roasting the chickpeas only take about 15 minutes to pull together with less than 10 ingredients that you probably already have in your panty! I used the lettuce as the “wrap” for this recipe but it would be equally as good wrapped in a tortilla or stuffed into a pita!
Are you ready for the easiest lunch you could whip together in 15 minutes? I have legit been eating these Curry Chickpea Lettuce Wraps with Cilantro Lime Rice all of the time since I first made them a month or so ago!
If you are craving the flavors of curry but are short on time you are going to love these Curry Chickpea lettuce wraps! They are shockingly easy and even with roasting the chickpeas only take about 15 minutes to pull together with less than 10 ingredients that you probably already have in your panty! I used the lettuce as the “wrap” for this recipe but it would be equally as good wrapped in a tortilla or stuffed into a pita! Plus, the cilantro lime rice is so good you’re probably going to want to whip up a big batch to use in all kinds of dishes for the week!


What you are going to need to buy:
Lettuce
One can of Chickpeas
Curry Spice
White Minute Rice
Lime Juice
Fresh Cilantro, chopped fine (or parsley, if you must!)
Avocado
Dairy Free Sour Cream
What you are going to need to do:
Start by preheating your oven to 425
Open the can of chickpeas and drain. Do not rinse.
Keeping the chickpeas in the can add 1 tablespoon of curry spice to the can and swirl around so that all of the chickpeas get covered with the spices.
Place chickpeas on a baking tray with a silicone mat or lined with baking paper.
Bake for 15 minutes, rotating them on the pan about half-way through.
Prepare your rice per the boxed directions allowing 1/4 cup of cooked rice for each wrap you’re making.
Once the rice is finished cooking, add lime juice and cilantro (To taste…I like mine really lime-y)
Open and slice one small avocado.
Mix 3-4 tablespoons of sour-cream with a squeeze of lime juice, just to thin it out a little.
Assembly!
Using your lettuce as your “shell” place your roasted chickpeas on top of a bed of the cilantro lime rice. Add avocado and drizzle sour cream to finish. Garnish with more fresh herbs and a sprinkling of curry powder!
See, told you that was easy! Save any extra chickpeas to use in stews or just to eat as a salty and crunchy snack.
Enjoy!

Baked Brussel Sprouts with Onion and Herb Sauce
I typically don't use much frozen produce but Publix had Birdseye veggies on sale a couple weeks back so I grabbed a few bags. Topped with a creamy sauce made with sauteed onions, nutritional yeast, garlic, oat milk from the Rise Brewing Company, and some herbed cream cheese from Miyokos Creamery I honestly wouldn't have even known the difference between fresh and frozen.
I typically don't use much frozen produce but Publix had Birdseye veggies on sale a couple weeks back so I grabbed a few bags. Topped with a creamy sauce made with sauteed onions, nutritional yeast, garlic, oat milk from the Rise Brewing Company, and some herbed cream cheese from Miyokos Creamery I honestly wouldn't have even known the difference between fresh and frozen.
One of the things that really upped my at-home cooking game in a big way was when I learned to master making a roux (pronounced rue)! Literally, the vault of all the soups and sauces you love, is guarded by the culinary gatekeeper that is, roux. All it takes is a little butter and a little flour, some liquid and seasoning…once you get this down, you’ll never buy cream sauces or soups from the can or jar again. The cream sauce for this recipe is no exception and was literally whipped up with ingredients you probably already have in your pantry.


What you are going to need to buy:
Brussel Sprouts - (these were the ones used in this recipe)
One medium Onion, diced
Minced Garlic - (we like these jarred options from Spice World!)
Flour
Original Oat Milk from Rise Brewing
Nutritional Yeast - (If you don’t care about this recipe being vegan, you can use some grated parmesan.)
Butter - (We love THIS ONE from Earth Balance)
Herbed Cream Cheese from Miyokos Creamery
Salt & Pepper
Fresh Herbs, for garnish (pictured is Lemon Thyme)
What you are going to need to do:
Remove the brussel sprouts from the freezer and allow to begin to thaw.
Preheat over to 350 degrees.
To begin, in a medium skillet, saute your onions and garlic with a little butter until the onions are soft and have taken on just a little color. Add 3 tablespoons of nutritional yeast and mix well.
Reduce heat to low and add another tablespoon of butter. Allow to melt.
Sprinkle 2 tablespoons of of flour over the top of the onions and the butter and with a large whisk, stir the flour into the onion until a paste is formed. Cook for 60 seconds and then gently add in 1 cup of oat milk, slowly, while you continue to whisk, so as not to get lumps.
Melt into mixture 1/2 cup of cream cheese.
Season to taste with salt and pepper.
Remove sauce from heat.
Remove the brussel sprouts from the bag. If they are still too frozen to cut in half, just pop them into the microwave for one minute. Cut all of the brussel sprouts in half
No need to drain any liquid from them. You sauce has likely thickened up and the moisture from the brussel spouts will help loosen it back up when combined.
It’s okay that your brussel sprouts are still cold at this point, even still slightly frozen.
Into an oven safe baking dish, mix the brussel sprouts with the sauce and top with another tablespoon of nutritional yeast (or parm.)
Bake at 350 for 20 minutes until bubbly. Broil for the final 2-3 minutes so the top takes on nice color.
Let sit for 5 minutes before serving. Garnish with fresh herbs.
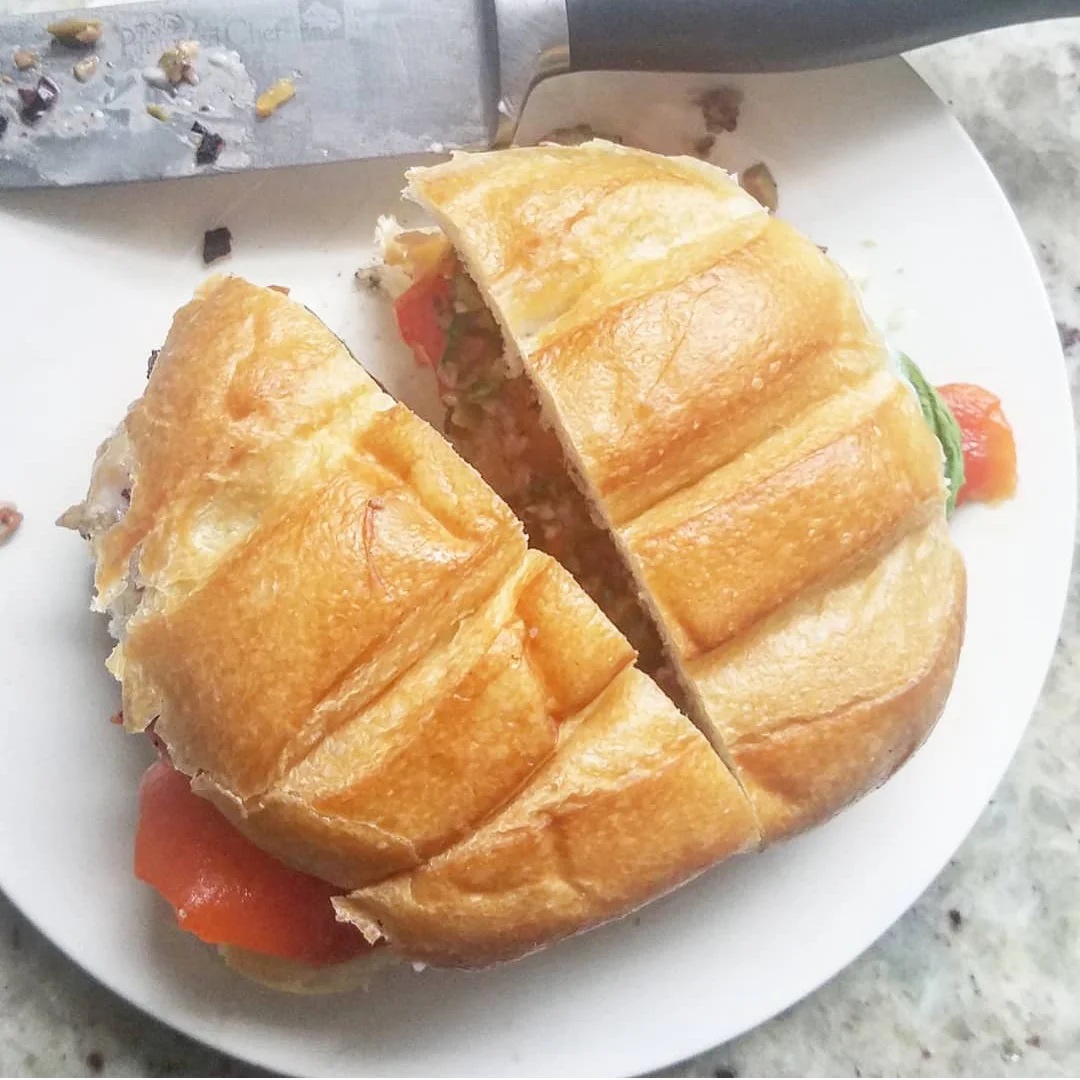
Easy Vegan Olive and Roasted Red Pepper Muffuletta
This easy Muffuletta is a plant-based twist on a popular and traditional New Orleans sandwich! If you’ve got a pallet that craves salty, briny, and vinegary flavors you are sure to love these olive infused sandwiches. Admittedly, they can be a little messy to eat, but I promise they are worth every sloppy bite!
This easy Muffuletta is a plant-based twist on a popular and traditional New Orleans sandwich! Typically made on a round Sicilian sesame bread bun it’s filled with meat, cheese, and the iconic olive spread! Our version uses roasted red pepper, and vegan deli slices in place of cold-cuts! With all of the flavor packed into this little sandwich this is a dish that you could absolutely serve a non-plant based crew!
Weekday, summer, nights call for easy dinners at my house…and bonus if it’s also a recipe where I don’t need to turn on the stovetop or the oven! And, these Easy Vegan Olive and Roasted Red Pepper Muffulettas fit the bill perfectly. Traditionally this Italian-American dish only uses meat, cheese, and olive spread but I also happen to like spinach and tomato…so my version includes those as well. If you’ve got a pallet that craves salty, briny, and vinegary flavors you are sure to love these olive infused sandwiches. Admittedly, they can be a little messy to eat, but I promise they are worth every sloppy bite!


What you are going to need to buy:
Rolls (Don’t overthink this. Use what you like…with one exception, do not use hamburger buns!)
Roasted Red Peppers (Roast your own, or buy them in a jar)
Tomato
Spinach
Green Olives
Kalamata Black Olives
Minced Garlic - (we like these jarred options from Spice World!)
Olive Oil
Vegan Cheese Slices (We like Follow Your Heart vegan Provolone Slices)
Vegan Deli Slices (We like Field Roast Smoked Tomato Slices and Tofurky Original Oven Roasted Slices)
What you are going to need to do:
First things first, I should confess that this recipe is super-easy…like you probably don’t really even need written directions to make it, but here we are…
To begin, you will want to finely chop a handful of green olives (The ones stuffed with pimento are my favorite for this) as well as a handful of black, kalamata olives.
*A note about olives…from someone who is a little bit of an olive snob. Try, as much as you are able, to stay away from canned olives. Opt for the fresh or jarred option, if you can. trust me, your taste buds will tank you for it.)
To the olive mixture add a drizzle of olive oil and minced garlic, to taste. Using the back of a fork, work the mixture by hand, mashing the olives and garlic into the oil, until it becomes slightly paste-like. You do still want the chucks of olives to be somewhat discernible but also need to be able to spread it onto the rolls.
From here, It’s just assembly. I started with a layer of spinach, followed by my roasted red pepper and my deli slices. I then added two slices of cheese and the tomato. On the top side of the bun, spread a generous amount of the olive mixture and top your muffuletta.
To serve, with a sharp, serrated knife, cut into halves or quarters.

Mom's Burrito Pie (Deep Dish Mexican Pizza!)
I grew up eating this dish once a week. Well, maybe that’s n exaggeration, but for sure, twice a month, at least! My Momma always called it burrito pie but someone informed me on my Instagram this week that it’s also deep dish Mexican Pizza! Either way, it's one of the most simple dishes you can imagine and it's good every single time! Dare I say, it will stand up to ALL the pickiest eaters, and this vegan version with homemade refried beans is the perfect thing to serve to a crowd of “mixed eaters”!
I grew up eating this dish once a week. Well, maybe that’s an exaggeration, but for sure, twice a month, at least! My Momma always called it burrito pie but someone informed me on my Instagram this week that it’s also deep dish Mexican Pizza! Either way, it's one of the most simple dishes you can imagine and it's good every single time! Dare I say, it will stand up to ALL the pickiest eaters, and this vegan version with homemade refried beans is the perfect thing to serve to a crowd of “mixed eaters”!
This recipe uses the homemade refried beans that we made earlier in the week. Obviously, canned are just fine but be careful because if you’re wanting this recipe to be plant based…check the can! Unless it otherwise states “vegetarian” a lot of commercial refried beans contain lard, making them not vegan at all…and not even vegetarian! Aside from that, the best part of this recipe, like a lot of the things I like to make, is that it’s totally customizable to your pallet and the ingredients that you love (or hate, as the case may be.)


What you are going to need to buy:
Tortillas, size depends on the casserole dish you want to bake this in and how large a pie you are making.
Refried Beans
Olive Oil
Ground “Beef” - this recipe used the ground from Beyond Meat but you do end up crumbing it up, so the frozen crumbles work just as well.
Medium onion, diced
Minced Garlic - (we like these jarred options from Spice World!)
Taco Seasoning (or your preferred spices to season taco meat)
Red Sauce or Enchilada Sauce (Not tomato sauce, chili based)
Cheddar Shreds - (pictured are the Cheddar Shreds from Violife)
Sour Cream - (Tofutti is the best!)
Diced Tomatoes
Fresh Herbs, for garnish
What you are going to need to do:
Preheat over to 350 degrees.
In a pan, on medium heat, with 1 tablespoon of olive oil saute’ you onions and garlic until the onion is translucent.
Add into the pan your Beyond Meat cook until brown and crumbled. Add a splash of water and your taco seasoning (amount will depend on how much filling you are making.) Taste for seasoning. Remove from heat.
In a round casserole dish, roughly the size of your tortillas, pour about 3 tablespoons of the red sauce into the the dish, just to cover the bottom.
We’re basically making taco lasagna!
Holding a tortillas in your hand, or placing it on the counter-top, spread a nice thick layer of refried beans onto the tortilla and place in the dish.
Note: Do not try to spread the beans on the tortilla after you place it in the dish or you are just going to pull your hair out! Before, before, before…
Layer the meat filling on top of the beans, followed by a handful of cheese and another 3 tablespoons of red sauce.
Repeat this layering process until you reach the top of the baking dish. I typically get 3 layers.
Top off your Burrito Pie with a final tortilla and pour the remaining red sauce onto the top to cover the entire thing.
Top with cheese and cover loosely with tin foil or the lid to the casserole dish. (Do not let the cover touch the cheese.
Bake at 350 for 30 minutes. After 30 minutes, uncover, turn your over to broil, and bake another 3-5 minutes until cheese is nice and melted. Keep a close eye on it for the last 5 minutes. Every stove/broiler is different and you don’t want it to burn!
Remove from oven and let stand for 15-25 minutes before serving.
Top with sour cream, tomatoes, and fresh herbs (or whatever you like…guac, pico, olives, etc…)
Cut into wedges and enjoy!

Creamy Hummus Pasta with Roasted Red Tomatoes (Lucky Left Overs Series)
When you live alone and cook for guests mostly on the weekends, your mid-week fridge can often end up filled with the odds and end s from dishes gone-by! This pasta dish is not only great because it uses up your leftover hummus but also because it really does take less than 15 minutes to throw together…and bonus, you can always use a tub of store-bought hummus if you have to!
Remember when I told you a couple of days ago that I was working on another recipe to use up the rest of that homemade hummus and pesto that we made for our zucchini fries? Well, friends…here it is! This Creamy Hummus Pasta with Roasted Red Tomatoes is just about the simplest dish to whip up but I promise your taste buds will thank you!
When you live alone and cook for guests mostly on the weekends, your mid-week fridge can often end up filled with the odds and ends from dishes gone-by! This pasta dish is not only great because it uses up your leftover hummus but also because it really does take less than 15 minutes to throw together…and bonus, you can always use a tub of store-bought hummus if you have to!


What you are going to need to buy:
Hummus, about 2 cups (for 2-3 servings) - CLICK HERE for the recipe that this recipe uses!
Sundried tomatoes, 1/2 cup - (we like the California SunDry Tomatoes that come in a jar! Plus, they keep in the fridge forever!
Cherry or grape tomatoes, cut in half, 7 or so, per serving
Lemon Juice
Salt and Pepper
Pasta of your choice
What you are going to need to do:
Preheat over to 415 degrees.
Cut your tomatoes in half and sprinkle with salt.
Place tomatoes on a baking tray with a silicone mat or lined with baking paper and roast for 12 minutes, flipping half-way through.
Cook your pasta, per the package directions, in salted water until tender.
Drain pasta, but reserve 1/2 cup of pasta water.
Gently stir in the hummus, the sundried tomatoes, and 1 tablespoon of lemon juice, adding the pasta water, as necessary, until the hummus coats the pasta with an “alfredo” like consistency. Note: You may not use all the pasta water and that’s okay.
Gently scoop the roasted tomatoes from the baking tray and fold them into the pasta.
Salt and pepper, to taste.
Drizzle with 1-2 tablespoons of the oil that the sundried tomatoes are packed in onto the top of the pasta before serving and garnish with fresh herbs.
See, I told you it was easy! In all likelihood, it took me longer to type up this post than it will for you to make this dish!
Enjoy!

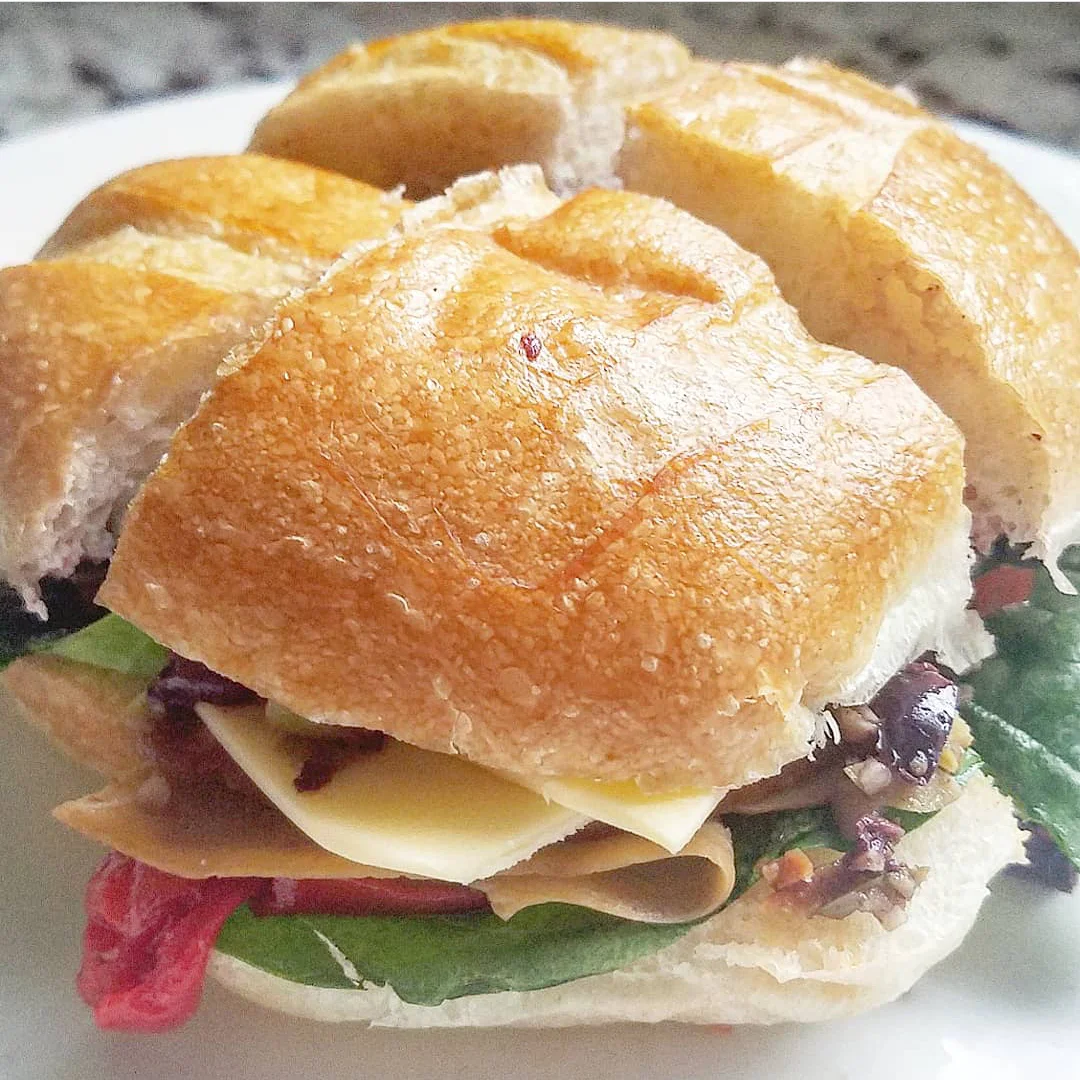
Roasted Red Pepper and Feta Sandwich with Olive and Garlic Spread
These Roasted Red Pepper and Feta Sandwiches with Olive and Garlic Spread are simple enough to whip up, even after the longest of days, and hearty enough to not feel like you are skimping on “dinner.”
Confession: I’ve been on a total sandwich kick this week…mainly because I bought some delicious rolls for my Vegan Muffulettas and, if I am honest, I typically don’t keep a lot of bread in the house…because, basically, I have no will power around carbs! But, tonight’s recipe is so easy and low calorie that none of that really matters…It’s delicious and that’s all you need to know.
I don’t know about you, but even though I love to cook, there are just some weeknights that I simply don’t have the energy for big, extravagant, gourmet, meals. This week has been that week, and full disclosure, I have had some variation of “sandwich” every night so far. Tonight is no exception but with the addition of this sandwich being toasted, I will admit, it feels more like a dinner, and less like a lunch! These Roasted Red Pepper and Feta Sandwiches with Olive and Garlic Spread are simple enough to whip up, even after the longest of days, and hearty enough to not feel like you are skimping on “dinner.”


What you are going to need to buy:
Rolls (Don’t overthink this. Use what you like…with one exception, do not use hamburger buns!)
Roasted Red Peppers (Roast your own, or buy them in a jar)
Spinach
Green Olives
Kalamata Black Olives
Minced Garlic - (we like these jarred options from Spice World!)
Olive Oil
Vegan Feta Cheese (We like Violife - Just Like Feta Block)
What you are going to need to do:
Honestly, I always feel a bit weird about calling a sandwich a “recipe” because it’s really just all assembly…but this one does have a couple of steps.
Set your oven to the broil setting…choose “low” if you have the option.
To begin, you will want to finely chop a handful of green olives (The ones stuffed with pimento are my favorite for this) as well as a handful of black, kalamata olives.
*A note about olives…from someone who is a little bit of an olive snob. Try, as much as you are able, to stay away from canned olives. Opt for the fresh or jarred option, if you can. trust me, your taste buds will tank you for it.)
To the olive mixture add a drizzle of olive oil and minced garlic, to taste. Using the back of a fork, work the mixture by hand, mashing the olives and garlic into the oil, until it becomes slightly paste-like. You do still want the chucks of olives to be somewhat discernible but also need to be able to spread it onto the rolls.
On the bottom half of your roll arrange spinach, the roasted red peppers, and thin slices of vegan cheese. For this dish, I love the saltiness of feta. It pairs so beautifully with the olives!
Place under the broiler for one to two minutes until cheese is soft and melt-y, but not not brown and the bottom of the roll is crunchy. This happens quick…keep your eye on it.
Add the olive spread to the top bun, top and serve by cutting into halves or quarters.
That’s it…see, told you it was easy!
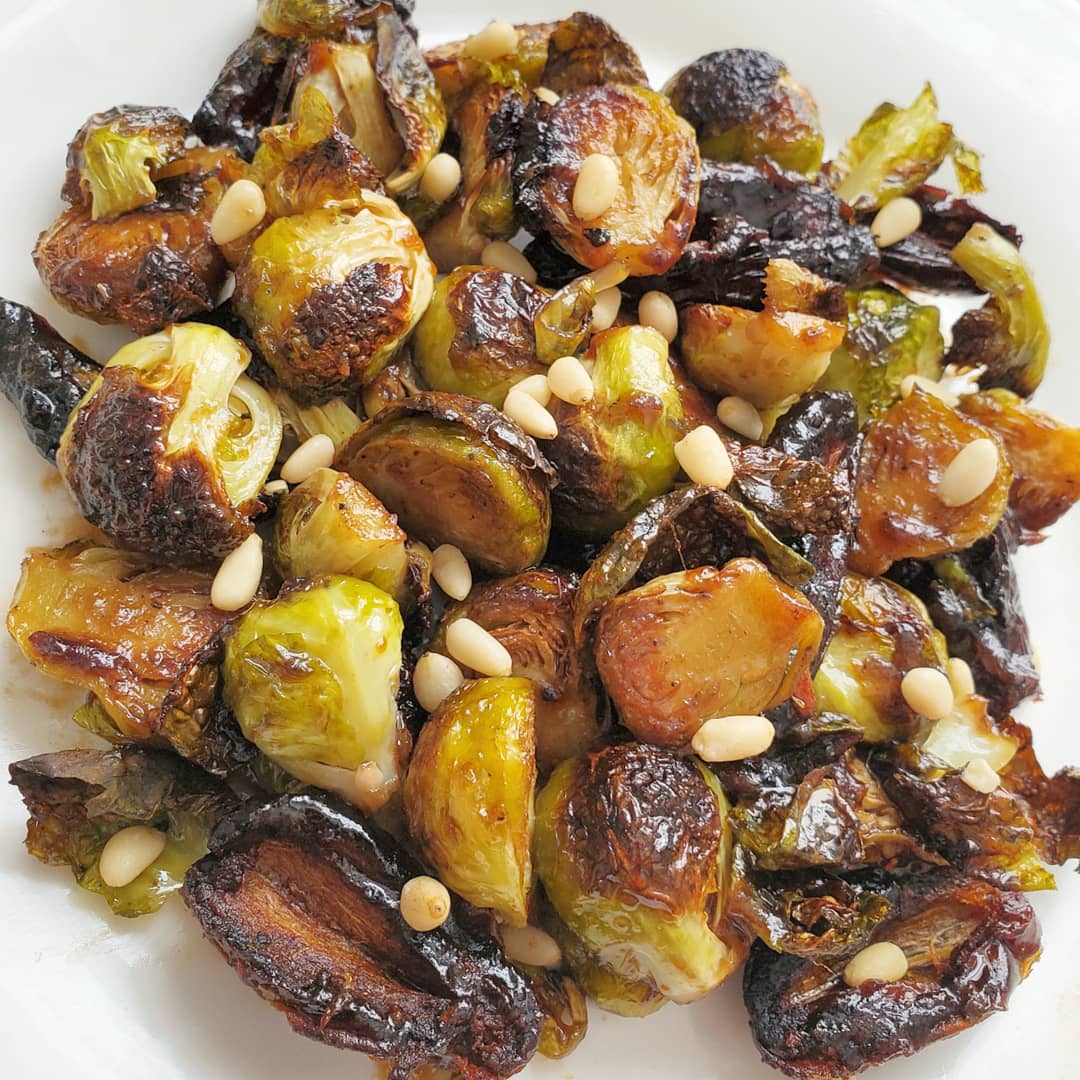
Crispy Roasted Brussel Sprouts with Dates and a Sweet Balsamic Glaze
Anyone who thinks that they don’t like Brussel sprouts, I dare you not to like this recipe. This dish is so good and so simple. It’s perfect for entertaining as we head into the holiday season because although brussel sprouts are often available year-round these days their peak season is from September to mid-February making them budget friendly for serving a crowd.
Anyone who thinks that they don’t like brussel sprouts, I dare you not to like this recipe. This dish is so good and so simple. It’s perfect for entertaining as we head into the holiday season because although brussel sprouts are often available year-round these days their peak season is from September to mid-February making them budget friendly for serving a crowd.
The trick to this recipe is, of course, fresh brussel sprouts, and really ripe dates! There is something kind of magical about the sugar content in the dates and how it almost caramelizes into a chewier crunch when they are roasted. If you are really time sensitive go ahead and get the pitted dates, but if you can spare a couple extra minutes I think buying dates with the pit in and removing yourself at home keeps them softer and sweeter. (I have no proof of this…it’s just been my experience.) With under 10 ingredients, including the spices, what’s not to love?


What you are going to need to buy:
Fresh Brussel Sprouts
Whole Dates
Pine Nuts
Salt and Pepper
Olive Oil
Minced Garlic - (we like these jarred options from Spice World!)
Maple Syrup - (The good stuff, not pancake syrup. You could also use agave or honey.)
Balsamic Vinegar - (I get mine locally here in Orlando from The Ancient Olive)
What you are going to need to do:
begin by preheating your oven to 400 degrees.
Remove all loose, witty, or soft outside petals from your brussel sprouts and cut in half length-wise.
Lightly oil, salt and pepper your brussel sprouts and place on a sheet pan or cookie sheet being careful that they are only one layer thick.
Cut your dates length-wise and remove the pit. Then cut each half length wise again so that you end up with 4 quartered wedges. Place on the sheet pan with the brussel sprouts. Roast at 400 degrees, on the middle rack for 25 minutes, flipping/stirring half-way through so that you can get some browning on all sides.
To make the glaze, mix equal parts of Olive Oil, and Balsamic Vinegar with minced garlic and maple syrup or honey, to taste. If you can’t find the thick balsamic vinegar, you can always take of of the extra soft and squishy dates from the package and scrape out the contents into the glaze. Use a fork or small wish to incorporate the date flesh into the mixture and it will thicken it up a bit. If you do this…you will need less maple syrup or honey because the dates are so naturally sweet.
After 25 minutes, turn oven on to a low broil and broil for another 5-7 minutes, checking every 90 seconds or so to make sure that nothing is burning. Note: The dates will get really dark in color, and you might be afraid that you have burned them…rest easy. You likely didn’t but this broil at the end is what makes them caramelize into a nice chewy crunch!
Once the brussel sprouts and dates are out of the oven, toss them with the glaze and allow to cool for 4-5 minutes before serving to let that glaze really thicken up. Garnish with pine nuts or chopped pistachios!
Enjoy!