


Healthy Chocolate Oatmilk Ice Cream - Only 5 Ingredients!
Not only is this Chocolate Oatmilk Ice Cream the one of the simplest summer recipes to make it also sneaks in an extra serving of veggies into your favorite summer snack by using avocados to make it extra creamy and dreamy! Only using 5 ingredients, most of which you probably alfready have in the house…it’s perfect for the kiddos because when it warms up it gets soft but never really "melts" making it much less of a mess for little mouths!
It's National Oat Milk Week and I'm celebrating with my friends over at Rise Brewing Co. using their Organic Chocolate Oatmilk to make this 5 ingredient dairy free ice cream!
Not only is this the one of the simplest summer recipes to make it also sneaks in an extra serving of veggies into your favorite summer snack by using avocados to make it extra creamy and dreamy!


Easily double or triple the recipe to serve a crowd. It's perfect for the kiddos because when it warms up it gets soft but never really "melts" making it much less of a mess for little mouths! Will definitely be serving this next weekend for Memorial Day!

Healthy Chocolate Oatmilk Ice Cream
Author: Sarah | April 19, 2021
Servings: 2-4
prep time: 15 minutes
freeze time: 3 hours - Overnight
total time: 8 hours
Ingredients: What You need to buy!
1 ripe avocado
1/4 c. Chocolate Oatmilk from Rise Brewing Co.
1/4 c. Cocoa Powder
3 tablespoons of Maple Syrup
Mini Chocolate Chips
Instructions: What You need to do!
Blend avocado, oatmilk, cocoa powder, and maple syrup until smooth.
Add a handful of chocolate chips and stir to combine
Freeze for 3 hours or up to overnight in a coverd bowl.
Serve with your favorite dairy free topping!
And…that’s it! See, I told you it was easy! Another of my favorite ways to enjoy this nice-cream is to make coffee floats! Simply use your favorite cold brew coffee, like the Nitro Original Black from the Rise Brewing Co. in place of root beer and top with a scoop of ice cream!
This recipe also happens to be the fastest and yummiest way to make dairy-free chocolate pudding! Simply skip the freezing step and refrigerate for about 30 minutes before serving! I really hope that you’ll try this Healthy Chocolate Oatmilk Ice Cream with Only 5 Ingredients this summer…and make sure to tag me when you do! @plantbasedgingr
Love, Light, and Lentils, my friends!
Sarah

Curry Zucchini and Cauliflower Tacos
For a new spin on an old classic, why not try these Curry Zucchini Cauliflower Tacos? With the creamy and dreamy texture of the Curry Zucchini Spread you honestly won’t even miss the sour cream on these Cauliflower Tacos…the best part? The entire recipe comes together in just about 20 minutes!
Who doesn’t love tacos? For a new spin on an old classic, why not try these Curry Zucchini Cauliflower Tacos? This Curry Zucchini Spread from Growee Foods is so creamy and packed full of flavor it’s the perfect swap for sour cream, (plus loaded with a lot more flavor…) making these tacos the perfect dish for all your plant-based AND dairy-friends!


With the creamy and dreamy texture of the Curry Zucchini Spread you honestly won’t even miss the sour cream on these Cauliflower Tacos…the best part? The entire recipe comes together in just about 20 minutes!

Curry Zucchini and Cauliflower Tacos
Author: Sarah | April 24, 2021
Servings: 4
prep time: 10 minutes
cook time: 15 minutes
total time: 20 minutes
Ingredients: What You need to buy!
1 jar of Curry Zucchini Spread from Growee Foods
Soft Tortillas or Taco Shells
1 can of Refried Beans
1 cup of Roasted Corn
Fresh Radishes, sliced thin
Vegan Cheese - (I used feta)
Fresh Parsley or Cilantro
1 tsp. Paprika
1 tsp. Garlic Powder
1/2 tsp Salt
Pinch of Cayenne pepper
Non-Stick Cooking Spray
Instructions: What You need to do!
To start, preheat your oven to 400 degrees.
Break down your cauliflower into bite sized pieces and sprinkle with paprika, salt, garlic powder, and cayenne pepper, (if you like a little kick!)
Roast for 10-15 minutes or until the cauliflower has softened.
Then simply fill your tortillas with refried beans, roasted corn, radishes, and add the spicy cauliflower.
Top each taco with 1-2 tablespoons of the Curry Zucchini Spread from Growee Foods!
- Garnish with the vegan cheese and fresh herbs! The hardest part about this recipe is going to be trying to get these things closed! Better grab a fork, just in case!
What I really love about the spreads from Growee Foods is how they help you get all flavor with almost none of the prep! Fast food doesnt mean you need to sacrifice your nutrition! All of their plant-based blends are naturally rich in flavor and full of all the good stuff...free of all the bad! Real food with real flavor! Check out their website for more dinner inspiration!
Love, Light, and Lentils, my friends!
Sarah

Turnip Green and Broccolini Salad with Poppy Seed Dressing
This new spin on one of my Mom’s favorites, incorporates both turnip greens and broccolini, and is a great way to "sneak in" some extra greens for all the picky eaters out there! The addition of the diced turnip greens to this Spring Salad doesn’t change the flavor of this traditional Broccolini Salad but it DOES give you an extra boost of healthy greens. Paired with a sweet and tangy Poppy Seed Dressing and loaded with fresh blueberries and pumpkin (or sunflower seeds) it's sure to be the new hit your table!
It’s Mother’s Day this weekend and this Spring Turnip Green and Broccolini Salad with Poppy Seed Dressing is perfect for all your spring and early summer get-togethers!
This new spin on one of my Mom’s favorites, incorporates both turnip greens and broccolini, and is a great way to "sneak in" some extra greens for all the picky eaters out there! Paired with a sweet and tangy Poppy Seed Dressing and loaded with fresh blueberries and pumpkin (or sunflower seeds) it's sure to be the new hit your table!


The turnip greens from Palmetto Gardens are perfect for spring and summer pre-dressed salads like this one, delivering a refreshing crunch with ingredients that won't wilt or lose their texture!

Turnip Green and Broccolini Salad with Poppy Seed Dressing
Author: Sarah | May 4, 2022
Servings: 6 to 8 side-portion servings
prep time: 15 minutes
assembly time: 5 minutes
total time: 20 minutes
Ingredients: What You need to buy!
Ingredients: To make the Salad
1.5 cups of finely diced Palmetto Gardens Turnip Greens
1.5 cups of broccolini florets, chopped into small, bite-sized pieces
1 medium red onion, diced small
1 cup of fresh blueberries
1/3 cup of pumpkin seeds (or sunflower seeds)
3/4 cup of shredded cheddar cheese (I used a dairy-free version)
Ingredients: To make the Dressing
1/4 cup of Maple Syrup
3 tablespoons of Apple Cider Vinegar
1 tablespoon Minced Garlic
1/4 cup of Olive Oil
2 tablespoons of sour cream (I used a dairy-free version)
2 tablespoons of Poppy Seeds
Salt and Pepper, to taste
Instructions: What You need to do!
To begin, remove the broccolini from the stems so that you get small, bite-sized, pieces...about the size of a nickel.
Finely chop your Palmetto Gardens Turnip Greens so they easily incorporate into the broccolini.
Dice your red onion.
Into a large bowl combine the broccolini, chopped turnip greens, onion, blueberries, cheese, and pumpkin (or sunflower) seeds
Gently toss to incorporate.
To make the dressing, whisk the sour cream and maple syrup until well combined. Do this step first to avoid lumps.
Continue whisking and add in the apple cider vinegar and olive oil. Whisk until smooth.
Stir in the minced garlic and the poppy seeds, along with the salt and pepper.
Taste for seasoning. For a more tangy dressing add another splash of apple cider vinegar...or if you prefer a sweeter dressing, add a bit more maple syrup.
Gently pour the dressing over the salad and toss to combine well. Keep cold before serving.
If you’re like me, you might not eat a lot of turnip greens as a part of your regular diet, at least not raw. Most of the greens that I had growing up were always stewed or creamed…neither of which are my favorite! The addition of the diced turnip greens to this Spring Salad doesn’t change the flavor of this traditional Broccolini Salad but it DOES give you an extra boost of healthy greens, plus…it’s a super thrifty way to help stretch your produce and reduce kitchen waste! I do hope you’ll try it this delicious spring salad recipe! Make sure to tag me when you do so I can see all of your yummy creations! Until next time…
Love, Light, and Lentils, my friends!
Sarah

RubyFrost, White, and Blue Summer Apple Salad w/ Poppyseed Dressing
Summer is right around the corner and that means Summer Salads! Whether you’re looking for your next recipe for the family cookout or just an easy recipe that doesn’t require turning on the oven, this RubyFrost, White, and Blue Summer Apple Salad w/ Poppy Seed Dressing will easily become your new favorite!
Summer is right around the corner and that means Summer Salads! Whether you’re looking for your next recipe for the family cookout or just an easy recipe that doesn’t require turning on the stove this RubyFrost, White, and Blue Summer Apple Salad w/ Poppyseed Dressing will easily become your new favorite!
Featuring delicious, RubyFrost Apples, the base of this salad swaps out boring, old, lettuce for shredded Brussel Sprouts, (Shhh, don’t tell them, they’ll never know!) and is packed full of pretty delicious flavor! Bonus, the amazing colors in this salad make it the perfect way to kick off your Memorial Day Festivities next month!


Grown by 152 family farmers across New York State, RubyFrost Apples are the perfect balance of sweet and tart - deep and rich color with a great, crisp texture!
Because of their high levels of vitamin C they are slow to brown, making them the perfect apple for a summer salad like this one!

RubyFrost, White, and Blue Summer Apple Salad w/ Poppy Seed Dressing
Author: Sarah | April 28, 2022
Servings: 6-8 (side portions)
prep time: 10 minutes
assembly time: 10 minutes
total time: 20 minutes
Ingredients: What You need to buy!
2 RubyFrost Apples, cut into 1/2" pieces (Reverve 1/4 of one apple to slice for garnish, if desired)
16oz Brussle Sprouts, shredded
6oz fresh blueberries
1/2 - 3/4 cup of Walnuts
Crumbled, Dairy Free Feta
Ingredients: To make the Poppyseed Dressing
1/4 cup Maple Syrup
1/4 cup Apple Cider Vinegar
1/2 teaspoon of Salt
1/2 cup Olive Oil
1 tablespoon poppyseeds
Instructions: What You need to do!
To begin, cut your brussle sprouts, from top to bottom, into very thin slices and they will automatically "shread" into a cole-slaw consistency!
Cut your RubyFrost Apples into 1/2" pieces. (Reverve 1/4 of one apple to slice for garnish, if desired)
In a large bowl, toss your shreaded brussle sprouts with your cubed RubyFrost apples, walnuts, blueberries and crumbled feta.
To make the dressing, mix the maple syrup, vinegar, oil, and salt. I like to use a frother to quickly emulsify the dressing. Once well mixed, add poppyseeds.
Dress the salad just before serving.
If you know me well, you likely know that I lived within walking distance of an apple orchard for over a decade…needless to say, I’m pretty picky about apples but these RubyFrost Apples are, truthfully, pretty delicious!
I picked up my RubyFrost Apples at my local Fresh Market but you can follow @RubyFrostApples on Instagram to see if this pretty delicious apple is in a store near you.
I hope you all will give this RubyFrost, White, and Blue Summer Apple Salad w/ Poppy Seed Dressing a try…and I’d love to hear how you love these RubyFrost Apples!
Love, Light, and Lentils, my friends!
Sarah

Jackfruit Carnitas Tacos with Sweet Apple Onion Salsa
One of my favorite flavor profiles is built around something hot and spicy combined with something tart and crisp and these jackfruit carnitas tacos topped with a diced apple and red onion salsa definitely fit the bill. These tacos are fancy enough to serve for guests and easy enough for a Taco Tuesday at home with the family! Let’s make them!
Warning: Not your traditional tacos! If you’re craving tacos but are tired of the traditional “beef and cheese” then you’re going to love these Jackfruit Carnitas Tacos with Sweet Apple Onion Salsa. One of my favorite flavor profiles is built around something hot and spicy combined with something tart and crisp and these definitely fit the bill.


Layered on a bed of buttered and wilted, shaved, brussel sprouts and topped with a touch of creme these tacos are fancy enough to serve for guests and easy enough for a Taco Tuesday at home with the family! Let’s make them!

Jackfruit Carnitas Tacos with Sweet Apple Onion Salsa
Author: Sarah | April 26, 2022
Servings: 4
prep time: 10 minutes
cook time: 10 minutes
total time: 20 minutes
Ingredients: What You need to buy!
10oz Jackfruit (I like to use frozen but the canned will work just as well.)
6-8 Brussel Sprouts, shaved or shreaded
2 tablespoons vegan butter
1 Medium Apple (something tart and sweet works best, Gala, Fuji, or RubyFrost)
1/2 Medium Red Onion
Dairy Free Sour Cream
Tortillas
1 teaspoon dried oregano
1/2 teaspoon ground cumin
1/2 teaspoon smoked paprika
1 tablespoon olive oil
1 tablespoon minced garlic
1 teaspoon of liquid smoke
pinch of Chili Powder
Splash of Apple Cider Vinegar
Salt and Pepper, to tatse
Instructions: What You need to do!
Into a medium skillet with 1 tablesspoon of olive oil add your thawed and shreaded jackfruit and cook with the oregano, cumin, paprika, chili powder, apple cider vinegar, liquid smoke, and minced minced garlic until the jackfruit has heated through.
Add salt and pepepr, to tatse. You can add a tablespoon or two of water if it becomes too try! (Think pulled pork texture and consistency)
While your jackfruit is cooking, shave down your brussel sprouts by starting at the tip and making very tin cuts all the way down to the stem/base. They should naturally pull apart annd shred on their own. (Think coleslaw texture)
Remove the jackfriut from the skillet and store under foil to keep warm. In the same skillet add 2 tablespoons of vegan butter and your shreaded brussle sprouts. Sprinkle with 1 teaspoon seasalt.
The goal is to wilt the brussle sprouts not cook them all the way so keep your heat on mediu low and stir occationally. This should take about 5 mintes.
While your brussle sprouts are wilting, cut your apple and your onion into small 1/4" pieces. Combine in bowl with a splash of Apple Cider Vinegar. Using the back of a fork muddle the apple and onio together.
To serve tacos, layer the warm and wilted brussle sprouts onto the trotilla and top with the jackfriut and apple/onion salsa.
Garnish with a bit of dairy free sour cream...and sprinkle with just a dash of the smoked paprika.
If you’ve made it this far…I’m hoping that the list of unusual favors in this dish havn’’t scared you off! While I know that apples and brussel sprouts don’t seem like the traditional ingredients for a Taco Tuesday grocery run, something about how the buttery greens melt into the spiciness of the jackfruit and are complimented with that punch of crisp and tart apple onion salsa is just perfection. If you’re craving tacos but are tired of the traditional “beef and cheese” then you’re going to love these Jackfruit Carnitas Tacos with Sweet Apple Onion Salsa.
Make sure to tag me on social when you make them so I can see! @plantbasedgingr
Love, Light, and Lentils, my friends!
Sarah

Corn'd Beef Sandwich with Quick Pickl'd Collard Greens
While collard greens might not be the traditional way to top a corn'd beef sandwich, the fibrous texture of collards makes them the perfect green to pickle. Unlike some other, more delicate greens, collards are easily able to retain their texture and bring a
While collard greens might not be the traditional way to top a corn'd beef sandwich, the fibrous texture of collards makes them the perfect green to pickle. Unlike some other, more delicate greens, collards are easily able to retain their texture and bring a delicious sweet and tangy crunch that pairs perfectly with the salty corn'd beef of this famous sandwich.


Irish or not, we promise that it's so good, you'll definitely want to kiss someone! The best part? You can store these Quick Pickl'd Collard Greens in the fridge for up to a month!

Corn'd Beef Sandwich with Quick Pickl'd Collard Greens
Author: Sarah | April 19, 2021
Servings: 4
prep time: 15 minutes
cook time: 8 hours - Overnight
total time: 24 hours
Ingredients: What You need to buy!
2 c. of Palmetto Greens chopped collard greens, think the texture you'd use for the cabbage in coleslaw.
1/2 medium, white onion, diced
1 t. salt
1 t. black pepper
2 tsp. minced garlic
1 t. dill seeds
1 t. fennel seeds
1/2 c. white vinegar
1/2 c. of maple syrup
Ingredients: To make the Sandwich
Seeded Sourdough Bread
Dairy-Free Cream Cheese
Vegan Corn'd Beef
Quick Pickles Collard Greens
Dairy-Free Thousand Island Dressing
Instructions: What You need to do!
Pack the chopped collard greens and diced onion into a mason jar and add all spices.
In a microwave-safe measuring cup, mix the vinegar and maple syrup, and heat for 1 minute, until hot.
Pour the hot liquid over the greens/onion mixture, seal, and shake to combine/mix well.
Refrigerate for a minimum of 60 minutes, up to overnight, before using.
Lightly toast two pieces of Seeded Sourdough Bread either in a hot skillet or traditional toaster
Spread Dairy-Free Cream Cheese onto the bottom piece of the Seeded Sourdough Bread.
Layer Corn'd Beef and top with a generous portion of the Quick Pickl'd Collard Greens.
Spread Thousand Island Dressing onto the second piece of bread and top the sandwich!
Seriously, since I made these Quick Pickl'd Collard Greens I have been eating them on everything! I hope that you’ll try this simple, spring, recipe! Trust me, you won’t be disappointed! I’d love to see your kitchen creations! Remember to tag me on IG @plantbasedgingr to keep in touch!
Love, Light, and Lentils, my friends!
Sarah

Autumn Inspired Minestrone Soup with Sweet Potato and Fresh Kale
Homemade minestrone soup is one of my favorite ways to use of the bits and pieces of produce that are hanging around your crisper drawer! The secret to this recipe is the roasted sweet potato and fresh kale! Of all the leafy greens kale is definitely king! It's one of the most nutrient rich foods on the planet and the Palmetto Gardens family has been growing some of the finest quality greens, locally here in the US, for 3 generations!
This Minestrone Soup is so easy and delicious you will wonder how you ever tolerated the canned stuff! A new twist on an old classic and inspired by the favors of Autumn this soup is made with roasted squash, zucchini, and sweet potato along with kale! It’s the perfect way to kick off #soupseason!
Homemade minestrone soup is one of my favorite ways to use of the bits and pieces of produce that are hanging around your crisper drawer! The secrte to this recipe is the roasted sweet potato and fresh kale! Of all the leafy greens kale is definitely king! It's one of the most nutrient rich foods on the planet and the Palmetto Gardens family has been growing some of the finest quality greens, locally here in the US, for 3 generations!


What you are going to need to buy:
4 tablespoons olive oil, divided
1 medium white onion, diced
1-2 tablespoons of minced garlic
2 tablespoons of tomato paste
1 28 oz can of San Marzano Tomatoes
4 cups of water *
3 tablespoons of veggie bouillon *
*Note: Or use your favorite veggie stock
1 medium yellow squash, cubed into 1/2" cubes
1 medium zucchini, cubed into 1/2" cubes
1 medium sweet potato, cubed into 1/2" cubes
1 teaspoon each: onion powder, garlic powder, salt, and black pepper
1 16oz can of white chili beans or butter beans
1.5 cups of dry ditalini pasta or your favorite small shell
2 cups of fresh, chopped, kale
Dairy-Free Parmesan, to garnish
What you are going to need to do:
Preheat oven to 400°
Cut your squash, zucchini, and sweet potato into cubes, lightly coat with olive oil and sprinkle with the onion powder, garlic powder, salt, and black pepper mixture.
Roast, uncovered for 30 minutes, stirring the veg halfway through roasting to get color on all sides.
While the veggies are roasting:
Into a stockpot, on medium heat sautee the diced onion, and minced garlic in olive oil until onion becomes soft and translucent.
Stir in the tomato paste and let simmer with the onion/garlic mixture for 2 minutes.
Add the can of San Marzano Tomatoes and with the use of a fork, or a potato masher, gently break up the big chunks of tomatoes into bite-sized pieces.
Bring mixture to a boil and then add your water+veggie bouillon or your veggie stock.
Add the dry pasta straight into the pot, along with the can of beans, only lightly drained.
Stir to combine.
Cook on a gentle, light, boil for 10 minutes until the pasta has softened.
Stir in your fresh Palmetto Garden's Kale, which has been chopped into 1-2" pieces, and gently fold into the soup to wilt the kale.
Turn the heat down to low/warm.
Retrieve the roasted veggies from the oven and gently add to the soup.
Taste for seasoning. Add onion powder, garlic powder, salt, and black pepper, to taste.
Let simmer for 5 minutes and serve topped with your favorite grated parmesan cheese!
Store leftover soup in a mason jar in the fridge for up to 2 weeks. Add up to 1/2 cup of water when reheating as the soup may thicken in the fridge over time.
Prep Time: 10 minutes
Cook Time: 35 minutes
Serves: Six

Vegan Watermelon "Tuna" Tartare
I don’t know what kind of vegan voodoo this is but I finally tried my hand at making #watermelontuna and holy avocado did is turn out...amazing! Not only did it LOOK like tuna but the taste and texture were shockingly similar!
Okay, I don’t know what kind of vegan voodoo this is but I finally tried my hand at making #watermelontuna and holy avocado did is turn out...amazing! Not only did it LOOK like tuna but the taste and texture were shockingly similar!
I decided to use my tuna to make a kind of tuna tartare or deconstructed sushi and it did not disappoint. I’m still trying to wrap my head around how this actually worked…but it totally did, and spoiler: it was actually really easy!


What you are going to need to buy:
To make the Tuna:
Watermelon - I used the pre-cubed watermelon that you can get in your local produce section. It ended up being about 12 chuncks of Watermelon
3 tablespoons Sesame Oil
2 tablespoon Soy Sauce
1/2 teaspoon Liquid Smoke
1/2 teaspoon each Salt and Pepper
Splash of Vinegar
Ingredients for the Tartare/Poke Bowl:
2 tablespoons Vegan Mayo
Hot Sauce, to taste
Rice
Edamame
Diced Mango
Sliced Avocado
(whatever else yo love in your sushi or poke bowl)
What you are going to need to do:
This recipe made 1 serving and you can scale it up, if you like. Don't worry too much about the measurements. As long as you have enough marinade to get each piece of watermelon coated, you should be good!
Start by preheating your oven to 375
The key to this recipe is having enough salt in the marinade when you are baking your watermelon that it balances the sweetness of the fruit.
Dunk all of the watermelon into the marinade until well coated. Let sit for 10 minutes.
Take your watermelon cubes (about 1.5” square”) and place them on a cookie sheet lined with a non-stick baking sheet, like a silpat mat OR onto parchment paper.
Bake for 30 minutes. After 30 minutes, turn the watermelon over on the baking sheet and rotate the sheet in the over 180 degrees. Brush the turned tops of the watermelon with any marinade that is left over.
Bake for another 30 minutes.
At the 1 hour mark yo should see something that really, really looks like tuna. It’s remarkable, really. I was shocked.
Remove from oven and let cool for 5 minutes.
And, that’s really all there is to it! See, told you it was easy! Now that you have your watermelon tuna, you can use it just lie you would use any tuna.
I diced mine into small pieces, mixed it with some vegan mayo, a splash of vinegar, a dash of hot sauce, more salt and pepper, to taste, and served it on top of rice, topped with diced mango, edamame, and spicy mayo.
This is where you can get creative? Did someone say vegan sushi?
Enjoy!

Creamy Roasted Garlic Tomato Soup
The summer is fading fast into fall but if you’re like me you probably still have a bunch of tomatoes hanging around. If you’re looking for an easy and quick recipe to help you transition in to soup season this dish does the trick! So flavorful and creamy even your non-veggie family and friends will ask for seconds! Bonus: canning this soup is super easy and because it’s tomato based doesn’t require any extra processing to safely preserve!
This Tomato Soup is so easy and delicious you will wonder how you ever tolerated the canned stuff! The trick to really amazing tomato soup is super-ripe, almost mushy, tomatoes! The more ripe they are the sweeter and more complex their flavor, and the more tomato-y your soup will turn out.
The summer will soon be fading fast into fall but if you’re like me you probably still have a bunch of tomatoes hanging around. If you’re looking for an easy and quick recipe to help you transition in to soup season this dish does the trick! So flavorful and creamy even your non-veggie family and friends will ask for seconds! Bonus: canning this soup is super easy and because it’s tomato based doesn’t require any extra processing to safely preserve!


What you are going to need to buy:
Tomatoes - 8 small to medium vine ripened tomatoes will make abut 2 servings of soup. I recommend roasting 4 small - medium (think between the the size of a medium plum) for each serving
Sweet Onion
Olive Oil
Balsamic Vinegar
Sugar or Maple Syrup
Minced Garlic - (we like these jarred options from Spice World!)
Veggie Stock - 1 cup, per desired serving
Your favorite Vegan Cream Cheese - (We used this one from Kite Hill Foods)
Cayenne Pepper, to taste
Salt & Pepper, to taste
Paprika, to taste
Basil, Chives, Oregano (optional)
What you are going to need to do:
Preheat oven to 400 degrees
Start my chopping an onion (1/2 for 2 servings or a whole onion for 4 servings)
Lightly oil a large skillet, (one with deep sides works the best)
Cut tomatoes in half. and arrange in skillet cut side down along with onions and 2-3 tablespoons of garlic.
Sprinkle with 2 tablespoons of sugar and drizzle with 2 tablespoons of Balsamic Vinegar and a pinch of Cayenne Pepper.
Saute’ on medium/high heat until the onions are translucent and the mixture is bubbling.
Transfer your skillet to the oven and roast the mixture for 15-20 minutes checking occationally. If it’s looking too dry you can add 1/4 cup of water to the skillet to make sure that the mixture does not burn.
After 20 minutes remove the onions and tomatoes from the oven and add to the pot your veggie stock.
Simmer on the stove-top for another 10 minutes. You can also add any herbs you’d like at this time.
Using a stick blender, blend soup until smooth! No need to worry about small seeds and skins, they all get blended together. Optionally, if you don’t have a stick blender, carefully transfer the soup to a stand blender and blend until smooth.
Stir in the cream cheese 1/4 to1/2 cup depending on number of servings.
Add salt, pepper, and paprika to taste. You can also add a touch more cayenne at this time, if desired. If you like a sweeter tomato soup add another tablespoon of sugar or maple syrup at this time.
This soup is great garnished with toasted pine nuts and sun dried tomatoes!
Enjoy!
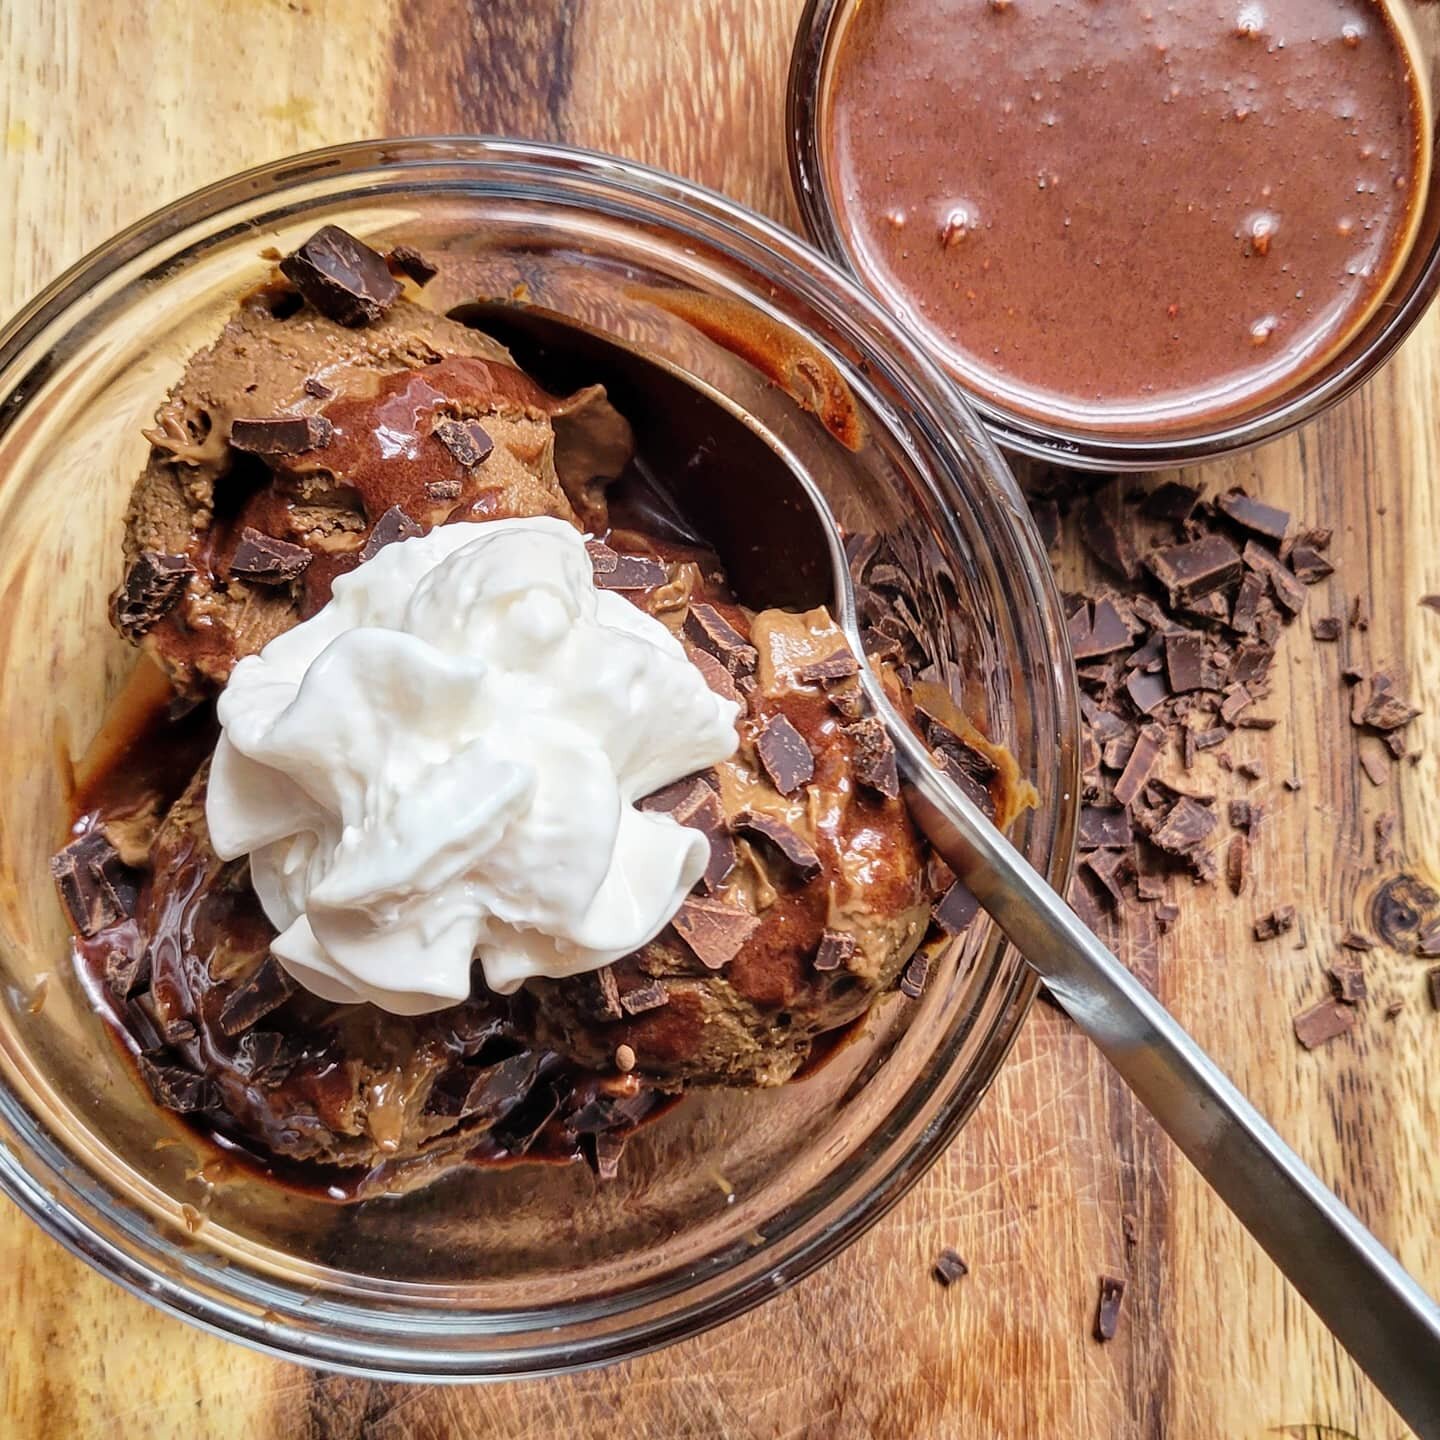
Melt Proof Dairy Free Chocolate Ice Cream - Great for Kids this Summer PLUS Easy Vegan Chocolate Sauce!
This recipe just might be the perfect summer-time treat to help you beat the heat! Yes, you do freeze it, and yes the finished product has the texture of ice cream, but because the base in not milk and eggs, even when it does warm up a little it never really “melts” only softens into a “pudding-like” consistency but never gets melty, messy or drippy!
This recipe just might be the perfect summer-time treat to help you beat the heat, plus because it’s packed with heart-healthy avocado, (yes, I said avocado, but don’t worry, no one will ever know!) and has no processed sugar, it’s great for kiddos, too! Plus, I’ll give you my tip for the fastest and easiest vegan chocolate sauce to top it with! Yum!

Oh, the memories of summer I have, from childhood, bargaining with my parents for the biggest ice cream they would allow, only to have it melting, running, and dripping down my arm, staining my face, hands, and clothes only a few bites in…Yes, you do freeze it, and yes the finished product has the texture of ice cream, but because the base in not milk and eggs, even when it does warm up a little it never really “melts” only softens into a “pudding-like” consistency but never gets melty, messy or drippy!
What you are going to need to buy:
Avocados (roughly 1 per each 1-2 adult servings)
Cocoa Powder
Salt
Oat Milk - (The Chocolate Oat Milk from the Rise Brewing Co. is perfect for this recipe)
Maple Syrup
That’s it…I know, right? Just trust me, It’s total magic!
What you are going to need to do:
In a high powered blender add your avocados and 1/4 cup of oat milk and 1/4 cup of Maple Syrup, pulse until the mixture begins to smooth out. This will depend of how ripe your avocados are. Add a bit more oat milk, if needed.
From here you are going to add 1/4 cup of cocoa powder and a pinch of salt and blend until smooth.
Now, the measurments on this are going to depend on a couple of things…how much ice cream you are making, how ripe your avocados are, and how sweet, rich, or “chocolate-y” you want your ice cream.
NOTE: We are going to freeze this and like all food that gets eaten frozen, the cold dulls the flavor profile, so you will want the mixture to be slightly more intense (sweetness and chocolate flavor) than if you were eating it at room temperature!
Go slow and take your time, especially with the Oat Milk because if you get it too runny to start with you’re going to need to add another avocado!
Keep adding Oat Milk, Syrup, and Cocoa until you get the flavor profile you like AND you have reached a consistency that is like a slightly soft pudding, but NOT runny or liquid like yogurt.
When you have achieved both a taste and a texture you like, transfer the mixture to a freezer safe bowl, cover, and freeze until firm. (This will take several hours)
While the Ice Cream is freezing…whip up the vegan chocolate sauce.
This is so remarkable easy, I feel silly even typing up directions:
in a small mason jar, with a lid, shake together 1 cup of maple syrup and 1/4 cup of cocoa powder. Want a thicker, “dark chocolate” sauce? Just add more cocoa. That’s it. See, I told you it was easy!
Shaking the mixture together in a jar is so, so, so much easier than trying to mix it together, in a bowl, with a spoon, which is almost impossible because of how finely processed the cocoa tends to be. If you don’t have a mason jar, use a small Tupperware container, with a lid.
To Serve:
Scoop the ice cream into cones or bowls, as desired and top with the vegan chocolate sauce and other toppings, like your favorite vegan cream!
Enjoy!

Easy Vegan Crab Cakes with Tangy Green Olive and Garlic Tarter Sauce
This dish is one of my favorites for a lazy summer afternoon, great to take to potluck or cookout, but comes together quick enough that it also makes a great week-night meal option. However, by far, one of my favorite things about this recipe is that these little cakes make the perfect base for seafood or fish tacos!
The perfect summer dish, these quick and easy, low calorie, Vegan Crab Cakes are guaranteed to become a favorite! Made with just a handful of ingredients this is one of those recipes that you can serve for a party and totally fool your non plant-based friends into thinking is the real deal!
Oh, mighty chickpeas, (or garbanzo beans) are packed with protein, vitamin K, iron, vitamin B-6, and magnesium making them an essential part of any plant based diet! These faux crab cakes combine chickpeas and hearts of palm with traditional spices making them almost indistinguishable from their real sea-food counter part. This dish is one of my favorites for a lazy summer afternoon, great to take to potluck or cookout, but comes together quick enough that it also makes a great week-night meal option. However, by far, one of my favorite things about this recipe is that these little cakes make the perfect base for seafood or fish tacos!


What you are going to need to buy:
Canned Chickpeas
Canned Hearts of Palm
Small white or yellow onion, minced
Seasoned Bread Crumbs
Vegan Mayo
White Vinegar
Green Olives
Minced Garlic - (we like these jarred options from Spice World!)
Old Bay Seasoning
Salt & Pepper
Fresh Spinach & Fresh Basil and Cherry Tomatoes for plating and garnish
What you are going to need to do:
This recipe can be made with or without using a food processor. I don’t have a small one myself, so I do all the chopping by hand because I also happen to like the internal contents of my crab cakes a little more rustic and less soft. Either way, to begin you need to drain your chickpeas and hearts of palm.
If you are electing to use a food processor combine the drained chickpeas, drained hearts of palm, and onion and pulse on low until nicely incorporated. Try not to get this mixture too creamy. You want a little texture left in the ingredients.
If you are going to chop/mash by hand make sure that your pieces are cut fine enough (somewhere between a dice and a mince.) The chickpeas will easily smash with the backside of a fork. Once you have everything chopped and smashed stir to combine all ingredients until well incorporated.
Whether or not you used a food processor or not for the first step, you will want to do the rest by hand. Stir in two tablespoons of vegan mayo, a splash of white vinegar, Old Bay Seasoning and salt/pepper, to taste and enough breadcrumbs to help the mixture hold together and become somewhat “pack-able.”
Form into small cakes. I like mine about 2.5 inches wide. Coat in breadcrumbs, remembering to also get the sides. let cakes sit for one minute and coat in breadcrumbs again.
In a small skillet, heat olive oil on medium heat, just enough to coat the bottom of the skillet, until oil is shimmering. Fry crab cakes, about 2 or three minutes on both sides or until dark, golden brown, and crispy. Let sit on paper-towel to absorb excess oil while you make the tarter sauce.
Combine vegan mayo, diced green olives, minced garlic, salt/pepper, Old Bay Seasoning and white vinegar until creamy. I like mine slightly runny, but the great thing about this sauce is that it’s flexible. Substitute pickle relish for the green olives for a more traditional tarter sauce or use green tomato relish for a sweeter version.
Serve over a spinach salad with diced tomatoes. Finely chop one or two fresh basil leaves and sprinkle on top to finish.
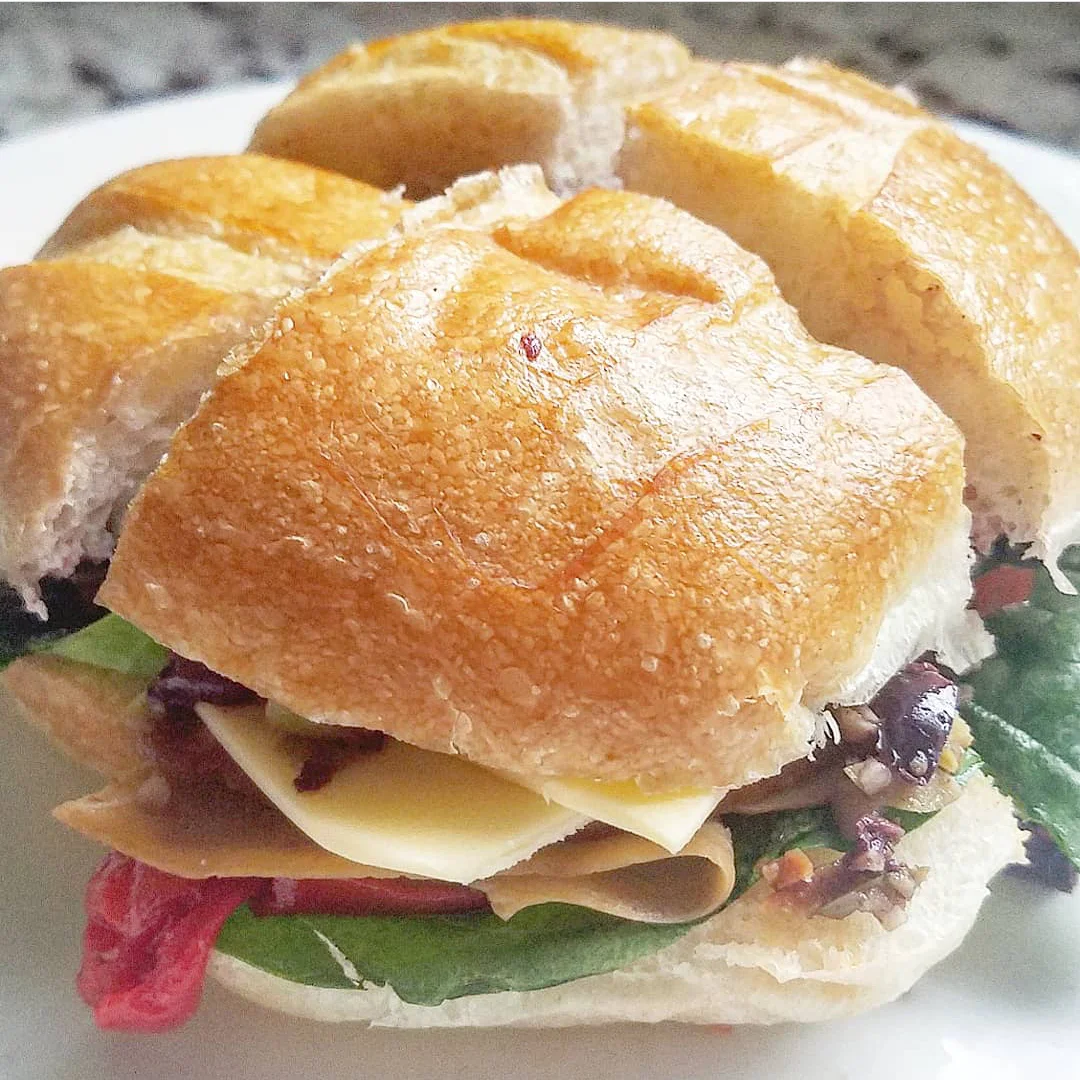
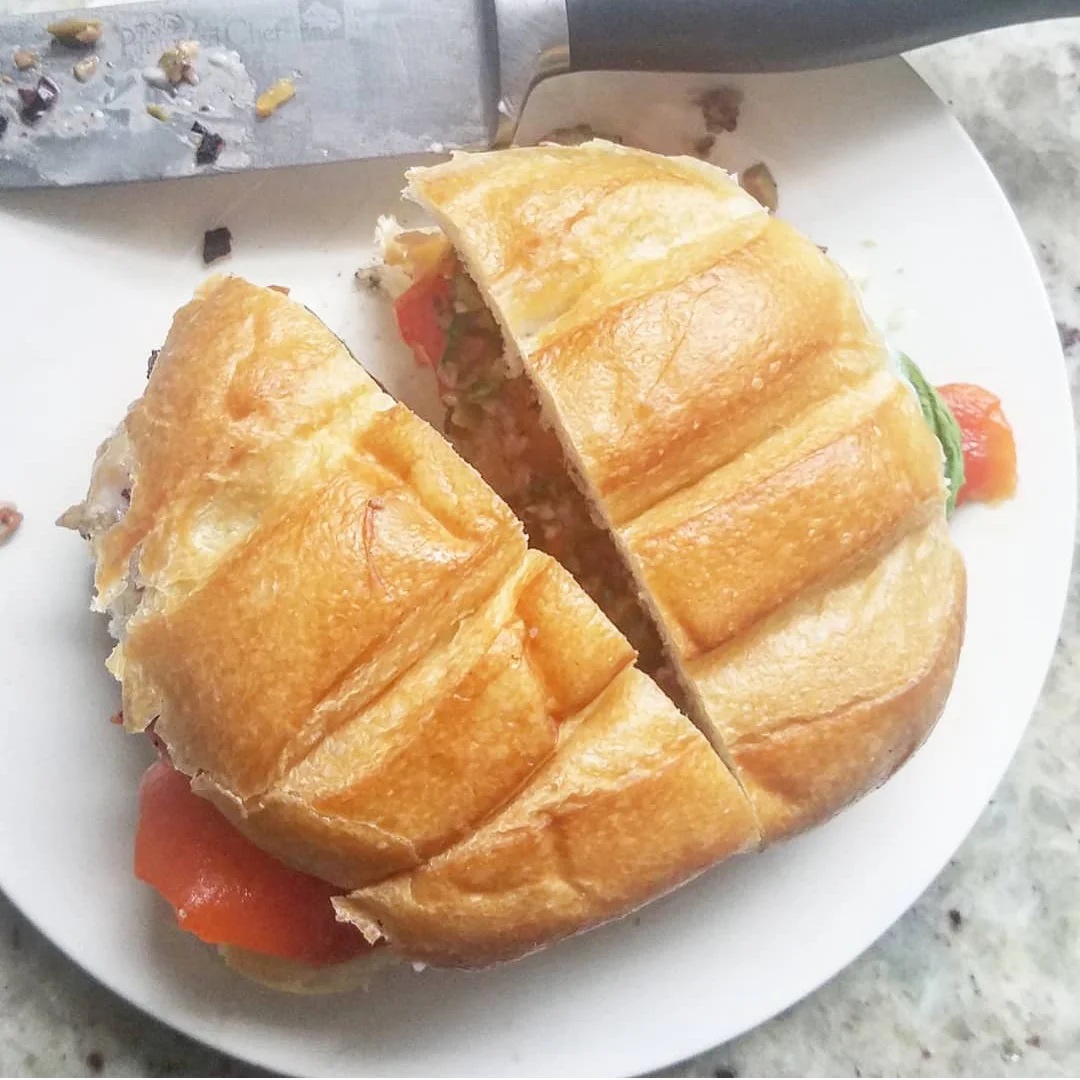
Easy Vegan Olive and Roasted Red Pepper Muffuletta
This easy Muffuletta is a plant-based twist on a popular and traditional New Orleans sandwich! If you’ve got a pallet that craves salty, briny, and vinegary flavors you are sure to love these olive infused sandwiches. Admittedly, they can be a little messy to eat, but I promise they are worth every sloppy bite!
This easy Muffuletta is a plant-based twist on a popular and traditional New Orleans sandwich! Typically made on a round Sicilian sesame bread bun it’s filled with meat, cheese, and the iconic olive spread! Our version uses roasted red pepper, and vegan deli slices in place of cold-cuts! With all of the flavor packed into this little sandwich this is a dish that you could absolutely serve a non-plant based crew!
Weekday, summer, nights call for easy dinners at my house…and bonus if it’s also a recipe where I don’t need to turn on the stovetop or the oven! And, these Easy Vegan Olive and Roasted Red Pepper Muffulettas fit the bill perfectly. Traditionally this Italian-American dish only uses meat, cheese, and olive spread but I also happen to like spinach and tomato…so my version includes those as well. If you’ve got a pallet that craves salty, briny, and vinegary flavors you are sure to love these olive infused sandwiches. Admittedly, they can be a little messy to eat, but I promise they are worth every sloppy bite!


What you are going to need to buy:
Rolls (Don’t overthink this. Use what you like…with one exception, do not use hamburger buns!)
Roasted Red Peppers (Roast your own, or buy them in a jar)
Tomato
Spinach
Green Olives
Kalamata Black Olives
Minced Garlic - (we like these jarred options from Spice World!)
Olive Oil
Vegan Cheese Slices (We like Follow Your Heart vegan Provolone Slices)
Vegan Deli Slices (We like Field Roast Smoked Tomato Slices and Tofurky Original Oven Roasted Slices)
What you are going to need to do:
First things first, I should confess that this recipe is super-easy…like you probably don’t really even need written directions to make it, but here we are…
To begin, you will want to finely chop a handful of green olives (The ones stuffed with pimento are my favorite for this) as well as a handful of black, kalamata olives.
*A note about olives…from someone who is a little bit of an olive snob. Try, as much as you are able, to stay away from canned olives. Opt for the fresh or jarred option, if you can. trust me, your taste buds will tank you for it.)
To the olive mixture add a drizzle of olive oil and minced garlic, to taste. Using the back of a fork, work the mixture by hand, mashing the olives and garlic into the oil, until it becomes slightly paste-like. You do still want the chucks of olives to be somewhat discernible but also need to be able to spread it onto the rolls.
From here, It’s just assembly. I started with a layer of spinach, followed by my roasted red pepper and my deli slices. I then added two slices of cheese and the tomato. On the top side of the bun, spread a generous amount of the olive mixture and top your muffuletta.
To serve, with a sharp, serrated knife, cut into halves or quarters.

BBQ Cauliflower Chick'n Wings with Easy Vegan Cabbage Coleslaw
The perfect summer BBQ meal, this Cauliflower Wings and Vegan Cole Slaw is a tasty dish that’s easy to make and easy to finish.
Let’s talk about a serious veggie glow-up! If it’s not cauliflower, then I don’t know what it is…traditionally mushy and steamed this veggie had a reputation of being plain, pale, bland. Not anymore!


It’s 2021 and all the carbs and protein you love seems to have been replaced by cauliflower. Naturally high in fiber and B-vitamins, it’s a great option for vegetarians and vegans who are concerned about getting enough B12. Not to mention that for the caloric count you can eat a plateful of these wings for the same as just a handful of traditional chicken wings. The perfect summer BBQ meal, this tasty dish is easy to make and easy to finish.
What you are going to need to buy:
Head of Cauliflower
BBQ Sauce – (we made our own, but store-bought works, too)
Bread Crumbs
Large Ziplock Bags
Shredded Cabbage or Slaw Salad
Simple Slaw Dressing – (again, we made our own but store-bought works, too)
Blue Cheese – (we used Kite Hill Foods, Vegan Chive Cheese Spread in its place)
What you are going to need to do:
Preheat oven to 350
Breakdown your cauliflower into large, “wing-sized” florets, discarding stems. (*Note: you can always use smaller pieces for kiddos)
Rinse and dry the cauliflower pieces.
Place pieces into the ZipLock bag with enough BBQ Sauce to make sure that they all get an even coat but not so much that it's runny or there is a lot of extra sauce in the bag. This really is going to depend on the sauce you are using. For a medium head of cauliflower start with one cup. You can always add more if it seems too dry.
Once all the pieces are coated, transfer the cauliflower to a large mixing bowl and sprinkle with breadcrumbs, stirring, gently to coat. The idea is to have the breadcrumbs stick to and slightly incorporate into the BBQ sauce so you get that nice "breaded" texture when they bake.
On a foil-lined baking sheet, that has been sprayed with a non-stick cooking spray, gently turn out all of the coated cauliflower pieces, making sure that they are not touching each other.
If you have extra sauce/crumb mixture in the bottom of the bowl, you can gently spoon it over the tops of the pieces that seem a little dry.
Bake at 350 for about 20 minutes. (This can vary depending on the size of your pieces) Checking occasionally to turn the baking sheet in the oven so that the pieces in the back do not cook too quickly or burn.
About halfway through cooking, you can use a spoon or BBQ brush to wash the tops of the pieces with one more coat of BBQ sauce.
Once finished baking, the cauliflower should be easy to pierce with a fork.
Let stand for 2-3 minutes on the baking sheet after removing from the oven, before plating. Top with blue cheese or, like we prefer Kite Hill Foods, vegan chive spread, and serve with coleslaw.
What’s in our Vegan BBQ Sauce?
Ketchup
Mustard
Brown Sugar
Worcestershire Sauce
White Vinegar
Onion Powder
Chili Spice
Salt & Pepper
What’s in our Vegan Coleslaw Dressing?
Vegan Mayo
Sugar
Minced Garlic
Lime Juice
White Vinegar

Roasted Red Pepper and Feta Sandwich with Olive and Garlic Spread
These Roasted Red Pepper and Feta Sandwiches with Olive and Garlic Spread are simple enough to whip up, even after the longest of days, and hearty enough to not feel like you are skimping on “dinner.”
Confession: I’ve been on a total sandwich kick this week…mainly because I bought some delicious rolls for my Vegan Muffulettas and, if I am honest, I typically don’t keep a lot of bread in the house…because, basically, I have no will power around carbs! But, tonight’s recipe is so easy and low calorie that none of that really matters…It’s delicious and that’s all you need to know.
I don’t know about you, but even though I love to cook, there are just some weeknights that I simply don’t have the energy for big, extravagant, gourmet, meals. This week has been that week, and full disclosure, I have had some variation of “sandwich” every night so far. Tonight is no exception but with the addition of this sandwich being toasted, I will admit, it feels more like a dinner, and less like a lunch! These Roasted Red Pepper and Feta Sandwiches with Olive and Garlic Spread are simple enough to whip up, even after the longest of days, and hearty enough to not feel like you are skimping on “dinner.”


What you are going to need to buy:
Rolls (Don’t overthink this. Use what you like…with one exception, do not use hamburger buns!)
Roasted Red Peppers (Roast your own, or buy them in a jar)
Spinach
Green Olives
Kalamata Black Olives
Minced Garlic - (we like these jarred options from Spice World!)
Olive Oil
Vegan Feta Cheese (We like Violife - Just Like Feta Block)
What you are going to need to do:
Honestly, I always feel a bit weird about calling a sandwich a “recipe” because it’s really just all assembly…but this one does have a couple of steps.
Set your oven to the broil setting…choose “low” if you have the option.
To begin, you will want to finely chop a handful of green olives (The ones stuffed with pimento are my favorite for this) as well as a handful of black, kalamata olives.
*A note about olives…from someone who is a little bit of an olive snob. Try, as much as you are able, to stay away from canned olives. Opt for the fresh or jarred option, if you can. trust me, your taste buds will tank you for it.)
To the olive mixture add a drizzle of olive oil and minced garlic, to taste. Using the back of a fork, work the mixture by hand, mashing the olives and garlic into the oil, until it becomes slightly paste-like. You do still want the chucks of olives to be somewhat discernible but also need to be able to spread it onto the rolls.
On the bottom half of your roll arrange spinach, the roasted red peppers, and thin slices of vegan cheese. For this dish, I love the saltiness of feta. It pairs so beautifully with the olives!
Place under the broiler for one to two minutes until cheese is soft and melt-y, but not not brown and the bottom of the roll is crunchy. This happens quick…keep your eye on it.
Add the olive spread to the top bun, top and serve by cutting into halves or quarters.
That’s it…see, told you it was easy!