


Healthy Chocolate Oatmilk Ice Cream - Only 5 Ingredients!
Not only is this Chocolate Oatmilk Ice Cream the one of the simplest summer recipes to make it also sneaks in an extra serving of veggies into your favorite summer snack by using avocados to make it extra creamy and dreamy! Only using 5 ingredients, most of which you probably alfready have in the house…it’s perfect for the kiddos because when it warms up it gets soft but never really "melts" making it much less of a mess for little mouths!
It's National Oat Milk Week and I'm celebrating with my friends over at Rise Brewing Co. using their Organic Chocolate Oatmilk to make this 5 ingredient dairy free ice cream!
Not only is this the one of the simplest summer recipes to make it also sneaks in an extra serving of veggies into your favorite summer snack by using avocados to make it extra creamy and dreamy!


Easily double or triple the recipe to serve a crowd. It's perfect for the kiddos because when it warms up it gets soft but never really "melts" making it much less of a mess for little mouths! Will definitely be serving this next weekend for Memorial Day!

Healthy Chocolate Oatmilk Ice Cream
Author: Sarah | April 19, 2021
Servings: 2-4
prep time: 15 minutes
freeze time: 3 hours - Overnight
total time: 8 hours
Ingredients: What You need to buy!
1 ripe avocado
1/4 c. Chocolate Oatmilk from Rise Brewing Co.
1/4 c. Cocoa Powder
3 tablespoons of Maple Syrup
Mini Chocolate Chips
Instructions: What You need to do!
Blend avocado, oatmilk, cocoa powder, and maple syrup until smooth.
Add a handful of chocolate chips and stir to combine
Freeze for 3 hours or up to overnight in a coverd bowl.
Serve with your favorite dairy free topping!
And…that’s it! See, I told you it was easy! Another of my favorite ways to enjoy this nice-cream is to make coffee floats! Simply use your favorite cold brew coffee, like the Nitro Original Black from the Rise Brewing Co. in place of root beer and top with a scoop of ice cream!
This recipe also happens to be the fastest and yummiest way to make dairy-free chocolate pudding! Simply skip the freezing step and refrigerate for about 30 minutes before serving! I really hope that you’ll try this Healthy Chocolate Oatmilk Ice Cream with Only 5 Ingredients this summer…and make sure to tag me when you do! @plantbasedgingr
Love, Light, and Lentils, my friends!
Sarah

Watermelon, Beet, and Blueberry Chick'n Salad with Balsamic and Lime Dressing
It is, hands down, a beautiful time of year. Blueberries are back in season and they are also on my favorites so it’s the perfect time for my Watermelon, Beet, and Blueberry Chick'n Salad with Balsamic and Lime Dressing! This is a great salad for entertaining outside because it not only looks beautiful but because there is no dairy…no fear if it comes up to room temp.
Admittedly, for a blog about food made from veggies, I don’t typically share a lot of salads. First of all, most of the time they seem kind of self explanatory…and secondly, I like to share dishes that challenge the stereotype that folks who eat plant based diets ONLY eat salads. Having said all that, this one is too good not to share!
It is, hands down, a beautiful time of year. Blueberries are back in season and they are also on my favorites so it’s the perfect time for my Watermelon, Beet, and Blueberry Chick'n Salad with Balsamic and Lime Dressing! This is a great salad for entertaining outside because it not only looks beautiful but because there is no dairy…no fear if it comes up to room temp.


What you are going to need to buy:
Lettuce - (I know this seems vague, but seriously, use what you like…or what you have unhand! Maybe not iceberg! I used a summer mix of baby greens)
Watermelon, cut into 1/2” cubes
Fresh Blueberries
Pickled Beets, cut into 1/2” cubes - (Do not skip this ingredient! I know, I know…you don’t like beets, blah, blah, blah! Trust me! You need the tangy and salty flavor that they provide to balance all of the sweetness from the watermelon and the blueberries in this salad!
Vegan, “Chicken” - (I used the Gardein Chick’n Strips…not a vegetarian, use whatever chicken or chicken substitute you like.)
Smoked Gouda, Crumbled - (I used the Daiya Smoked Gouda Block and that’s what I would recommend. I like that smoked flavor and how it plays with the other ingredients in the salad. I know a lot of people like a tart or briney cheese, like a feta, with watermelon but with the beets in this dish, and remember you are NOT going to skip the beets…the smoky gouda is the way to go!)
Pistachios, chopped
Small Lime
Balsamic Vinegar - (I get mine locally here in Orlando from The Ancient Olive)
Fresh Mint
What you are going to need to do:
Assembly Time!
You really can’t screw this up too terribly. The only tip that I have for this salad, and all salads in general, if you are making it for a crowd, is to layer your ingredients so that when you dig into the bowl to serve it, everything is already well incorporated.
You do have a couple options for the cheese. It comes In block form and you can absolutely just chop it into small pieces (think pea sized), or you can use the tines of a fork to kind of grate the cheese over top of the salad so that it’s a bit more “crumbly.”
For the dressing, simply mix the balsamic vinegar of your choice with the juice of half a lime, to your preferred taste. (Salt and Pepper are optional, if that’s your thing!) This salad is pretty juicy with all the fruit so a little goes a long way with the dressing. Be careful: too much and it will sog-out the whole dish.
P.S. This salad pairs perfectly with a mojito, just sayin’!
Love, light and lentils, my friends!
Sarah

Fresh Green Bean Salad with Garlic and Basil infused Balsamic Dressing
Looking for ways to transform typical, boring, picnic or potluck style side salads? This Fresh Green Bean Salad with Sweet Ginger and Basil infused Balsamic Dressing will be the hit of your next pot-luck, I promise! Easy to make, and even easier to serve, this twist on the traditional creamy, cold, green bean salad is a great way to cut the dairy without cutting the flavor!
Looking for ways to transform typical, boring, picnic or potluck style side salads? This Fresh Green Bean Salad with Sweet Basil infused Balsamic Dressing is the perfect salad for your shin-dig this weekend! Easy to make, and even easier to serve, this twist on the traditional creamy, cold, green bean salad is a great way to cut the dairy without cutting the flavor!
When most of us think green beans we typically think one thing: casserole. Now, don’t get me wrong, I love a good green bean casserole just as much as the next gal but I’m always looking for ways to use them in other recipes, especially this time of year when they are so fresh and inexpensive. One of the things that I love most about this recipe is that the dressing isn’t a dairy-base, which means its the perfect option for your BBQ, picnic, or potluck because their is no worry about it sitting out too long and going bad!


What you are going to need to buy:
Lettuce - (I know this seems vague, but seriously, use what you like…or what you have on hand! You don’t need too much! I like the contrast of the purple and red lettuces BUT remember this is a green bean salad, after all…not a lettuce salad with green beans in it. I would suggest your beans to lettuce ratio be at like a 3 : 1 - so don’t over think the lettuce.
Fresh Green Beans, trimmed and cut into 2 inch pieces (4 cups)
Grape Tomatoes, halved or quartered - (For an even prettier salad try using the tri-colored blend)
Fresh Basil
Olive Oil
Salt and Pepper
Minced Garlic - (from the jar is just fine…)
Maple Syrup - (The good stuff, not pancake syrup. You could also use agave or honey.)
Smoked Gouda, Crumbled - (I used the Daiya Smoked Gouda Block and that’s what I would recommend.
Pine Nuts - (or Almonds would also be quite good in this dish)
Small Lime
Balsamic Vinegar - (I get mine locally here in Orlando from The Ancient Olive)
What you are going to need to do:
This recipe can scale up or down pretty easily depending on the size of salad you want to make. I have literally made this salad as a single serving before by just cooking up 3/4 cups of green beans and washing a handful of lettuce. For a nice pot-luck or family sized salad I would suggest 4 cups of green beans. This is a green bean salad, after all…not a lettuce salad with green beans in it. I would suggest your beans to lettuce ratio be at like a 3 : 1
To begin we need to blanche our green beans. In a medium pot, filled with boiling, salted water, cook beans for 10 minutes. After 10 minutes, remove beans from boiling water and plunge into an ice bath to stop the cooking and retain the bright green color. Drain beans and pat dry with a paper towel.
Now, for assembly time!
You really can’t screw this up too terribly. The only tip that I have for this salad, and all salads in general, if you are making it for a crowd, is to layer your ingredients so that when you dig into the bowl to serve it, everything is already well incorporated.
You do have a couple options for the cheese. It comes In block form and you can absolutely just chop it into small pieces (think pea sized), or you can use the tines of a fork to kind of grate the cheese over top of the salad so that it’s a bit more “crumbly.”
For the dressing, mince 3-4 large basil leaves into very fine pieces. (Note: please use fresh basil…this is not the place for the dried stuff. It just will not taste the same!) Combine 1/2 cup of Olive Oil, 1/2 cup of Balsamic Vinegar, 2 tablespoons of Maple Syrup, 1 tablespoon of minced garlic, minced basil, and salt and pepper to taste.
This salad is best served very cold! If possible, assemble all ingredients (minus the dressing) and let chill in the refrigerator for 30 minutes, up to one hour, before serving to make sure the green beans are not still lukewarm from cooking. Drizzle the dressing over the salad before serving. Finish with a fresh squeeze of lime, and garnish with a few more small basil leaves.
Enjoy!

Summer Squash and Sweet Corn Chowder
While everyone else is itching for pumpkins I’m trying to hold onto every last flavor of the Summer season that I can! With only two weeks left until we fall into Autumn, I’m also trying to take advantage of the bountiful and inexpensive Summer produce while it lasts and this Late Summer Squash and Sweet Corn Chowder does just that.
While everyone else is itching for pumpkins I’m trying to hold onto every last flavor of the Summer season that I can! With only a month or so until we fall into Autumn, I’m also trying to take advantage of the bountiful and inexpensive Summer produce while it lasts and this Summer Squash and Sweet Corn Chowder does just that.
If there is anything that you have left at the end of the Summer season it’s probably sweet corn and squash! This chowder, while isn’t necessarily a 30-minute meal, is still a great weeknight option because most of the cook-time is just simmering, making it a great multi-tasking dinner option. All in, you’re looking at maybe 45 minutes, because we are going tome our own stock, but trust me, it’s totally worth it.


What you are going to need to buy:
Fresh Sweet Corn (4 ears) - (I repeat, fresh…as in, on the cob, as in, not in a can!)
Yellow Squash - (I like the look of the yellow squash mixed with the yellow corn in this recipe….but if you’ve got zucchini to get rid of you can absolutely use that.
Mushrooms - 1.5 to 2 cups (We like either shiitake or cremini mushrooms. If you live in the South East and can find the “gourmet blend” at your local Publix, even better!)
Carrots
Medium Shallot, diced
Minced Garlic - (from the jar is fine…here is a great option from Spice World!)
Olive Oil
Salt and Pepper
Fresh Thyme
Dry White Wine - (Remember, if you wouldn’t drink it…don’t cook with it)
All Purpose Flour
Your favorite plant based milk - (I used the Forager Project Brand Half & Half)
Scallions, for garnish
What you are going to need to do:
Step one is to prep your corn. Remove the husks and as much silk as you can. Rinse and pat dry.
Using a sharp knife, remove the kernels from the cob, cutting as close to the cob as you can. Watch your fingers. Place corn in a large bowl and set aside.
In a large pot bring 6-8 cups of water to a boil, with 3 tablespoons of salt and 2-3 stems of fresh time. Once water is simmering, add your corn cobs to the pot (If your corn cobs are too large just cut in half) and allow to simmer for 30-35 minutes, stirring occationallly, while you prepare the rest of the vegetables. Stock should reduce by about half.
Chop shallots, squash and carrots into small pieces (about 1/2” thick) Mushrooms can remain slightly larger, as they will drastically shrink down when cooked.
In a large skillet, over medium heat, cook sweet corn and carrots with 2 tablespoons of olive oil, and a pinch of salt and pepper, until bright yellow and slightly softened. (3-5 minutes) Reserve 1/2 cup of corn/carrots for garnish when serving and set the rest aside in a large bowl.
In the same skillet, over medium heat sauté, in olive oil, garlic, squash, shallots, and mushrooms, being careful not to let. the vegetables take on too much color, or stick to the bottom of the pan. (about 5 minutes) After shallots have turned translucent, and mushrooms have reduced in size, add the corn and carrot mixture back into the skillet and sprinkle over 2-3 tablespoons of all purpose flour. Stir veggies to incorporate the flour. Cook for one-two minutes until the flour smells slightly nutty.
Deglaze the skillet with 1/4 cup of dry, white, wine and stir, somewhat vigorously, to thicken. Slowly add 1 cup of strained corn cob stock to the skillet. Reduce heat and set skillet aside.
Strain out all solids from the corn cob stock and gently add all of the vegetables into the stock pot. Mix until well incorporated, making sure there are no lumps. Increase heat to medium and add 2 cups of your favorite plant based milk. Bring to a light boil, reduce heat and let simmer for another 5-7 minutes before serving. Taste for seasoning. At this point, it almost always needs back pepper!
Serve sprinkled with a tablespoon on the reserved corn/carrot mixture from earlier and the diced scallions.
Additional, top with your favorite brand of vegan cheddar spreads - (We love the Cheddar Shreds from Follow Your Heart)
Serve and enjoy!

Southern Style, Mushroom, Pulled Pork Sandwiches with Vegan Slaw
Remember 20 years ago before vegan food got cool? Before we had fake burgers and pea protein, and seitan at our fingertips in our local grocery stores? Back then, we ate, um…mushrooms, and we ate a lot of them! These Mushroom Pulled Pork Sandwiches are the perfect summer cook-out or picnic food…made with love and just a little sprinkle of nostalgia for the simple plant-based recipes that got me into this lifestyle to begin with!
Remember 20 years ago before vegan food got cool? Before we had fake burgers and pea protein, and seitan at our fingertips in our local grocery stores? Back then, we ate, um…mushrooms, and we ate a lot of them! These Mushroom Pulled Pork Sandwiches are the perfect summer cook-out or picnic food…made with love and just a little sprinkle of nostalgia for the simple plant-based recipes that got me into this lifestyle to begin with!
I have had an awful lot of requests for this recipe after posting it last week as what we enjoyed for our Memorial Day festivities! If I’m honest, this is another one of those recipes that I feel a little guilty calling a “recipe” because it’s so simple…I’m sure we could have some heated debate over sauce and slaw but I’ll share with you how I made mine and you can always customize it to your own tastes when you make it at home! (And you SHOULD make it at home because, YUM!)


What you are going to need to buy:
Mushrooms! - (figure on 6oz of mushrooms, per serving!)
(Ok, listen, friends! I know there are a lot of fancy mushrooms on the market these days but for this recipe I just used what my local Publix had on sale, which was, plain, ol’ white mushrooms!)
Liquid Smoke
Minced Garlic - (we like these jarred options from Spice World!)
BBQ Sauce - (Buy or make your own!)
Cole Slaw Mix (this is another reason why this recipe is so easy…I simple bought the pre-shredded slaw mix from the produce section and made my own dressing!)
Vegan Mayo - I have really been into the egg-free option that Hellman's has these days!)
White Wine Vinegar
Maple Syrup
Mustard
Salt & Pepper, to taste
Burger Buns (Sara Lee has great dairy-free options)
What you are going to need to do:
The main part of this recipe and, dare I say, the only really skill needed to make it much of a success is slicing the mushrooms! I order for this recipe to really mimic the texture of pulled pork you want to slice your mushrooms as thin as possible.
I actually bough the pre-sliced white mushrooms and then took the individual slices and cut them into tiny “sticks” - think like the thickness of a tine on a fork. It takes a bit of time, but it’s worth it…and it’s still less time than the 8 hours it takes to make traditional pulled pork!
Once your mushrooms are all sliced, we are going to saute them in a medium skillet, with minced garlic and a few splashes of liquid smoke until they are cooked down and soft.
Be careful here! Because you cut them so thin, you’ll need to be a little on the gentle side when stiring them in the pan!
Once the mushrooms are cooked, simply add your favorite bbq sauce and let simmer for another 2 minutes. Be careful not to burn the sauce.
Onto the Coleslaw!
In my world, there is simply no other way to eat this sandwich than with it being topped with slaw!
Like i said, above, I buy the prepackaged coleslaw mix that has the shredded cabbage and carrots all ready to go, but feel free to shred your own!
For the dressing we are going to mix:
1 cup of vegan mayo
1 tablespoon of white wine vinegar
1-2 tablespoons of mustard, depending on how much you like mustard
1 tablespoon of maple syrup
Salt and pepper, to taste.
In my experience this is going to make enough dressing for one bag of coleslaw…(4 servings)
Toss your shredded cabbage and carrots with the slaw dressing and park in the fridge for 20 minutes or so! You can even make this the night before!
The Assembly!
Bun
Mushroom “Pulled Pork”
Coleslaw
Bun.
It really is that easy! Some people I know top theirs with potato chips, fresh sliced or caramelized onions, melted cheese, homemade pickles, and even pickled jalapeños! We served them with some grilled street corn and baked beans! Does it get any more “summer” than that?
Enjoy!
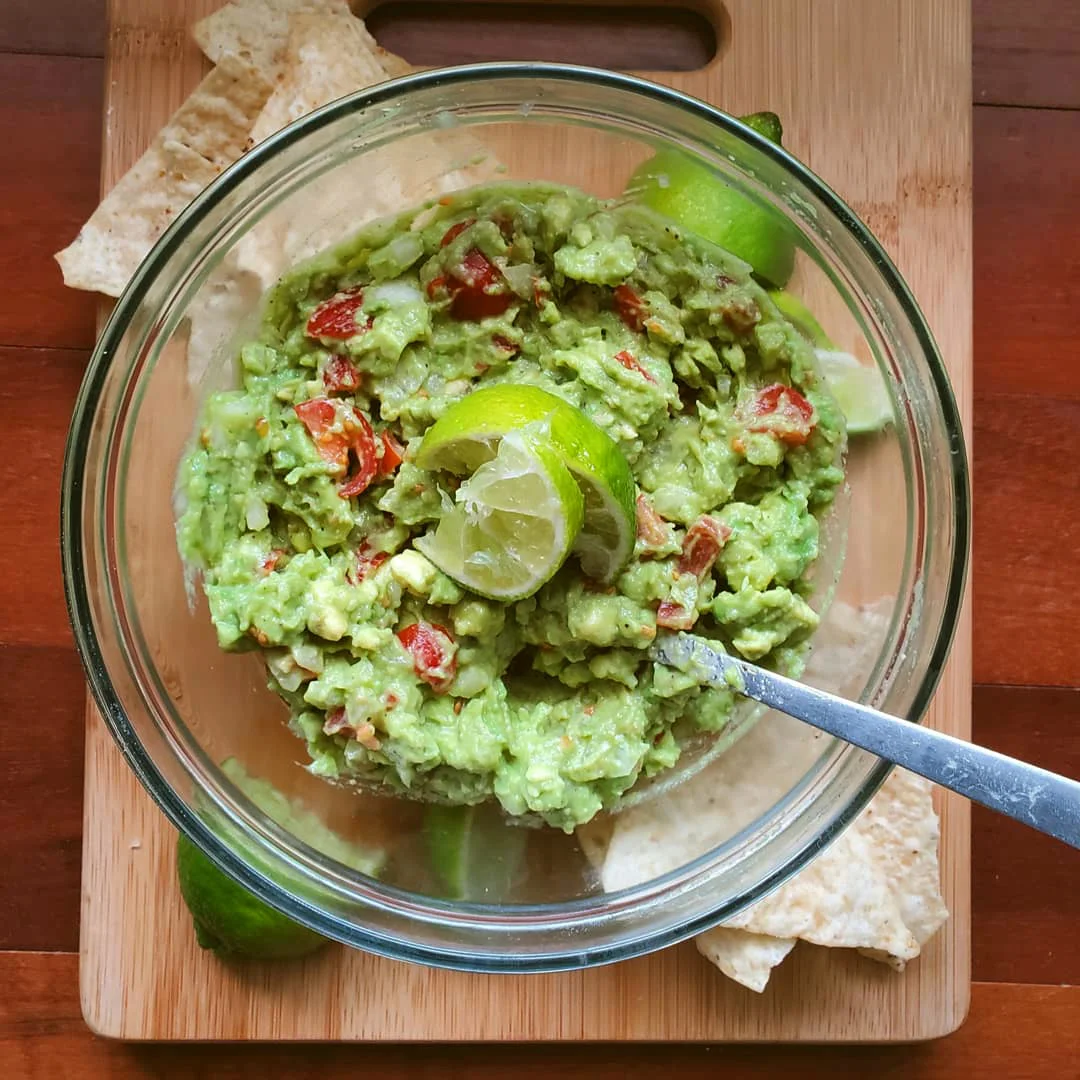
The Best Fresh and Chunky Guacamole
If I had to choose between most restaurant and grocery store guac and no guac at all…I’d be on the anti-avocado train myself. Luckily, now you have this recipe! It’s so easy and delicious, I promise…you’ll never want to eat store-bought ever again. Perfect for a party, this recipe is sure to turn even the pickiest eaters green with avocado envy
I love avocados! Big surprise, I’m sure. Hang onto your hats…I also love guacamole! But, I know that a lot of people, (gasp)…do not. Perfect for a party, this recipe is sure to turn even the pickiest eaters green with avocado envy
I’m personally convinced that there are two reasons why some people don’t like avocados (and guacamole to be more specific): one, people who don’t eat them often, are a little intimidated about buying avocados, (ie: knowing when they are ripe) and two, because most of the “guacamole” that people have had at their restaurants and neighborhood backyard barbecues is basically green, processed, mushy baby-food! Yuck! If I had to choose between most restaurant and grocery store guac and no guac at all…I’d be on the anti-avocado train myself. Luckily, now you have this recipe! It’s so easy and delicious, I promise…you’ll never want to eat store-bought ever again.


What you are going to need to buy:
2 Ripe Avocados
1/2 Small Red Onion, diced
Handful of Cherry Tomatoes, diced
Garlic, minced - (our favorite is from Spice World!)
1 Fresh Lime
Salt & Pepper, to taste
Cilantro, if that’s your thing…
Mayo (Optional)
What you are going to need to do:
Open your avocado by slicing through the entire circumference of the fruit! Yes, It’s a fruit. I know…I know. It’s green. Look it up! Fruit, I promise. (Mind blown!)
Gently twist the two halves apart and with a large, sturdy kitchen knife, remove the pit. This is exponentially easier when the avocados are ripe.
Score the flesh of the fruit into a grid pattern and then scoop out the contents from the skins.
Into a mixing bowl combine the flash of two avocados, the diced onion, the diced tomatoes, (Using yellow and red tomatoes makes for an extra pretty dish, perfect for entertaining) and 1 -2 teaspoons of minced garlic.
Using the back of a fork, gently mash the mixture together to smooth out some of the lumps, being mindful not to turn your homemade guacamole Into the aforementioned baby-food. Personally, I like mine a little on the chunky side.
Squeeze in the contents of one small lime (Do not skimpy this…) and add salt and pepper to taste. If you’re a cilantro lover throw a handful of rough chopped cilantro into the bowl, give a final stir and serve!
That’s it! I told you it was easy!
Enjoy!
(A note about the Mayo: This can be either traditional or vegan mayo and can be a good trick to use if your avocados are not quite ripe enough to make your guacamole very creamy. Take 1 heaping tablespoon of mayo and add to the avocado when you are doing your initial “mash and mix” step. If you do add mayo, just know, it will flatten out the flavor a little and you will likely need a pinch more salt plus some more garlic and lime.)