


Banana and Peanut Butter Bread Pudding
What do you do with bananas that are on their way out and more sourdough bread than you can possibly finish? Banana and Peanut Butter Bread Pudding, of course! There is just something about this recipe that’s hard to beat! Great for a crowd, this vegan dish, that’s really more like dessert than breakfast is made with dairy free butter, oatmilk, and JustEgg and comes together in under an hour!
What do you do with bananas that are on their way out-the-door and more sourdough bread than you can possibly finish? Banana and Peanut Butter Bread Pudding, of course! If you’re a fan of “dump and bake” kinds of recipes you’re going to love this one. The most time-consuming part is simply cutting up the bread and slicing the bananas!

Now, cards on the table…I don’t particularly love either bananas OR bread pudding but there is just something about this recipe that’s hard to beat! Great for a crowd, this vegan dish, that’s really more like dessert than breakfast is made with dairy free butter, oatmilk, and JustEgg and comes together in under an hour!
What you are going to need to buy:
For the Bread Pudding
3-4 cups of crusty bread, cut into cubes
3 ripe bananas cut into slices
2 cups of oatmilk
JustEgg to replace 3 large eggs
1 tablepoon of cinnamon
1 teaspoon of nutmeg
1/2 cup brown sugar, more for sprinkling
1/2 teaspoon of salt
Splash of Vanilla
1/2 cup of peanut butter
1/2 cup of Walnuts
For the Icing1/2 stick Dairy Free Butter, melted
Powdered Sugar, 1 cup
Splash of Vanilla
Pinch of Salt
What you are going to need to do:
Layer your cubed bread and banana slices into a baking dish (I used an 8 x 10) sprayed with non-stick spray.
Combine the remaining ingredients (minus the nuts and brown sugar for sprinkling) and wisk until well combined. Don’t be too worried if the peanut butter doesn’t completely combine or there are still little pieces. They will melt when baked!
Pour mixture over the bread and bananas. Spoon any peanut butter that didn’t totally dissolve evenly over the top.
Top with walnuts and sprinkle with brown sugar.
Bake at 375 for 40 minutes. You can gently lay a piece of foil over the baking dish to keep the top from burning but keep sides loose and un-crimped. You don’t want your Bread Pudding to “steam” under the foil…it’s just to keep the top from getting too crispy! Remove the foil for the final 15 minutes of baking.
While the Bread Pudding is baking mix together 1/2 stick of melted vegan butter with 1 cup of powdered sugar, 1/2 teaspoon of vanilla and a pinch of salt. (Add more or less sugar depending on how thick you like your icing.)
At 40 minutes, remove from oven and let stand for 15 minutes before drizzling the top with icing and serving.
A couple of notes about this recipe: I know there are a lot of “egg-replacers” that vegan and non-dairy diets use in baking. I used the product JustEgg and it turned out wonderfully. I can’t guarantee that others will do the same…they may be great but I’ve not tested any others with this particular recipe.
Love chocolate? You could totally throw in a handful of chocolate chips to this recipe and it would be delicious!
Love, Light, and Lentils, my friends!
Sarah
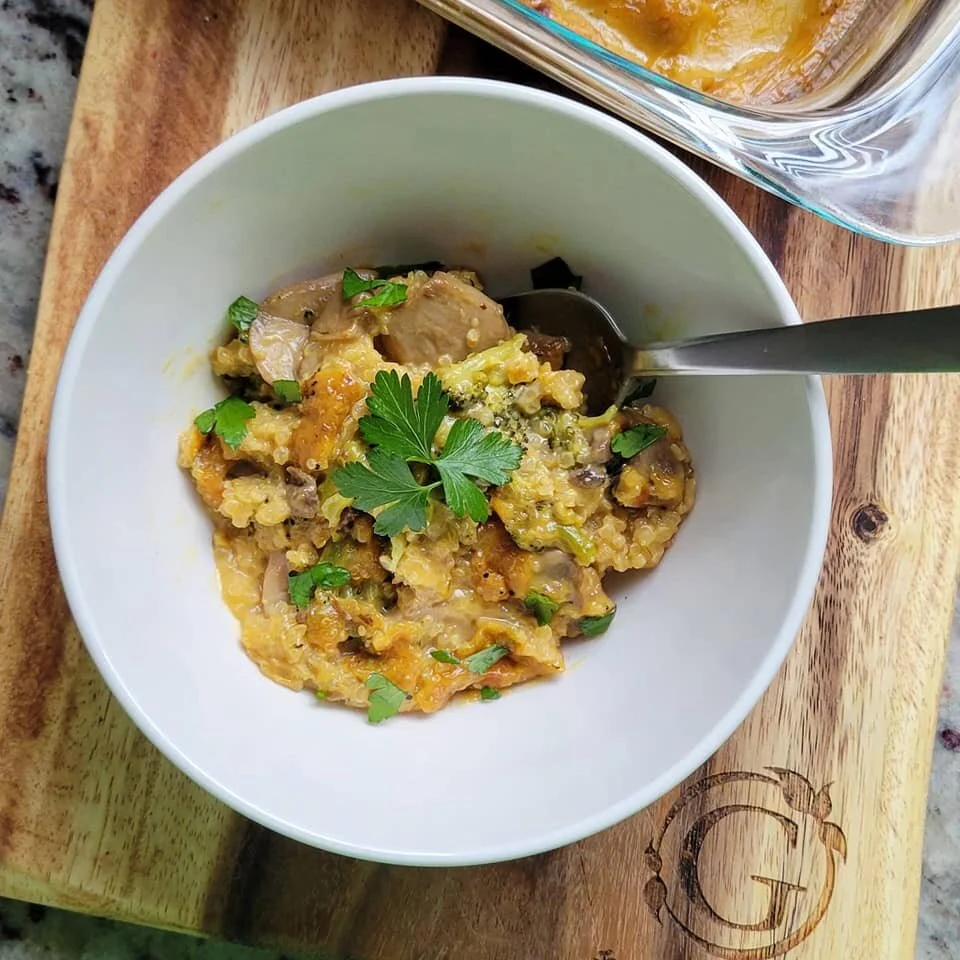
Cheesy Quinoa, Mushroom, and Broccoli Bake
Okay, friends...are you ready for your new favorite side dish? This Cheesy Quinoa, Mushroom and Broccoli Bake is my vegan take on a recipe from an all time favorite chef of mine Alton Brown! Part Mac n' Cheese, part, Broccoli Casserole...hopefully this updated plant based version does his original recipe justice...I'm not gonna lie, it's one of the best things that I have eaten in a long time! Yum!
Okay, friends...are you ready for your new favorite side dish? This Cheesy Quinoa, Mushroom and Broccoli Bake is my vegan take on a recipe from an all time favorite chef of mine Alton Brown! Part Mac n' Cheese, part, Broccoli Casserole...hopefully this updated plant based version does his original recipe justice...I'm not gonna lie, it's one of the best things that I have eaten in a long time! Yum!
Bonus: This recipe requires a killer cheese sauce, so two recipes in one!
One of the most frequent comment I get, from friends and strangers alike, when it comes to plant-based and dairy free recipes is “What about cheese?” The truth is…non-dairy cheeses have come A LONG way in the last several years. This recipe is proof of that! Here’s my bet…even your cheese loving friends will gobble it down!


What you are going to need to buy:
FOR THE CASSEROLE:
Dried Quinoa - (They do sell, ready to serve, quinoa in a bag…which I have never tried. If that’s your thing, give it a go!)
Fresh Broccoli - (You could honestly use frozen if you have it on hand in the freezer)
White Mushrooms, sliced
Non-Dairy Butter - (We used Earth Balance)
Veggie Stock or Bouillon Cubes - (We used THESE from Edward and Sons)
Minced Garlic - (We like the jarred kind from Spice World)
Balsamic Vinegar - (We get ours from this great little place here in Central Florida called The Ancient Olive)
Just Egg - (Or, your favorite egg replacer)
FOR THE CHEESE SAUCE:
Non-Dairy Butter - ( We used Earth Balance)
Flour
Your Favorite Plant Milk - (We love this Organic Oat Milk from RISE BREWING)
Non-Dairy Cheese Shreads - (We used THESE CHEDDAR SHREADS from VioLife!)
Yellow Mustard - (yes, just trust us!)
Salt and Pepper
Non-Dairy Sour Cream - (in our opinion Tofutti is the OG…and also the best!)
What you are going to need to do:
Start by cooking your quinoa. I used 3/4 a cup of dried quinoa in about 1.5 cups of liquid. Follow your package directions.
In another pot, with a little butter, garlic, and a splash of balsamic vinegar, cook your mushrooms (6-8 ounces) until they have reduced in size by about half, are soft, and they have taken on a nice, brown, color.
Chop your broccoli (5-6 ounces) into small florets.
At this point, add your cooked mushrooms, and fresh broccoli to the pot with the quinoa, (there should still be a little liquid left) reduce heat to warm and cover. The heat and steam in the pot will cook the broccoli.
Now, onto the cheese sauce!
Wipe out the pot that you were cooking your mushrooms in and, on low heat, melt about 2 tablespoons of butter. Gently allow butter to brown, but not burn, because we’re going to make a roux.
Sprinkle 2 tablespoons of flower on top of the melted butter and whisk to combine. Cook mixture for about 30 seconds and then slowly add 1.5 cups of oat milk, whisking the entire time so that no lumps form. Bring to a boil and let boil about 30 seconds.
Reduce heat and add the cheddar shreds, stirring to melt.
Add 1 tablespoon of yellow mustard…don’t be afraid, just do it! (You can use brown mustard, if you like it!)
Stir in 1/4 cup of sour cream.
Continue to stir, on low/medium heat, until everything is melted.
Add salt and pepper, to taste. It will take more salt than you think…a full teaspoon isn’t too much! (I also added some onion and garlic power to mine for this dish!)
…And, boom! vegan cheese sauce! If it seems thin, increase the heat and let simmer for 1-2 minutes, but remember it will tighten up as it cools.
Assembly:
Preheat your oven to 350.
Mix in the equivalent of ONE egg of your favorite egg replacer into the quinoa/mushroom, broccoli mixture.
Add the cheese sauce to the casserole mixture and stir gently to combine. Bake in a 9x9 casserole for 30 minutes at 350 and then broil on LOW for the last 5 minutes to add a nice brown color to the top. (Keep your eye on it for this last part…all ovens are different. Don’t burn it!
Total bake time, about 35 minutes.
Let rest for 10 minutes before serving. Garnish with herbs, if that’s your thing. I used some fresh, flat-leaf parsley.
Makes 4 side-dish sized servings, but full disclosure, I totally ate this last night for my legit dinner…dinner servings: 2-3ish
Enjoy!

Poor Man's Vegan Chicken Parmesan Casserole
Who doesn’t love a good pasta dish? It’s the kind of comfort food that you crave when life get’s crazy and you don’t have any idea what else to make for dinner. Or, if you are like me, this week, it’s because you just need to go to the grocery store! This Poor Man's Vegan Chicken Parmesan Casserole is also the perfect way to use up the pasta that you have at home because just about any kind of noodle or shell will work for this dish.
Who doesn’t love a good pasta dish? It’s the kind of comfort food that you crave when life get’s crazy and you don’t have any idea what else to make for dinner. Or, if you are like me, this week, it’s because you just need to go to the grocery store! This Poor Man's Vegan Chicken Parmesan Casserole is also the perfect way to use up the pasta that you have at home because just about any kind of noodle or shell will work for this dish.
I have made several versions of a plant-based Chicken Parmesan dish over the years, but honestly, this is one of the easiest and everyone, even the meat eaters in my life, always love it. Part traditional Chicken Parmesan, part pasta casserole, it’s the best of both worlds when you’re craving some comfort food, plus because you’re not doing all the breading and frying it comes together in half the time, just about 30 minutes, total.


What you are going to need to buy:
Your favorite kind of pasta shell or small noodle. (Pictured here is cavatappi, or as my niece calls them, corkscrews!)
Red Sauce - (Make your own or use your favorite jarred brand. Trust me, either way, it’s going to be delicious.)
Vegan Parmesan - (We love the Follow Your Heart shredded Parmesan)
Vegan Mozzarella - (The Miyoko's Creamery has one that melts and browns up so nice that you’ll never know the difference)
Minced Garlic - (we like these jarred options from Spice World!)
Breaded Vegan Chicken Strips or Tenders - (Pictured here are the Gardein Crispy Tenders)
Salt and Black Pepper
Italian Seasoning or Fresh Herbs
What you are going to need to do:
To start, take your fingers out of the freezer so they can begin to thaw. (You can even pop them into the microwave for 30 seconds, or so…)
Preheat oven to 350 degrees
In a stock pot, bring salted water to a rolling boil to cook your desired pasta.
Once your pasta is cooked drained, mix in your pasta sauce and parmesan cheese. Amounts will vary based on how much past you have cooked and how many portions you are making. You want the pasta nice and covered in the sauce because you’re going to bake this dish and don’t want it to dry out.
I like to also mix in a bit of minced garlic to the pasta and the shells at this point.
Layer the pasta in a casserole dish, leaving room at the top for the Chicken.
Lay the chicken strips on top of the pasta. It’s best if these are at room temperate at this point and not frozen.
Place a heaping tablespoon of red sauce on top of the tenders and top with a thick slice of mozzarella.
Cover tightly with tin foil and bake for 15 minutes.
Uncover and turn your oven to broil. Broil, uncovered for 5 minutes to really melt that cheese and get some nice browning but keep your eye on it because it can go from brown and bubbly to burned real quick!
Let sit for 3-4 minutes before serving. Top with fresh herbs and serve with your favorite garlic bread!
Enjoy!