


Healthy Chocolate Oatmilk Ice Cream - Only 5 Ingredients!
Not only is this Chocolate Oatmilk Ice Cream the one of the simplest summer recipes to make it also sneaks in an extra serving of veggies into your favorite summer snack by using avocados to make it extra creamy and dreamy! Only using 5 ingredients, most of which you probably alfready have in the house…it’s perfect for the kiddos because when it warms up it gets soft but never really "melts" making it much less of a mess for little mouths!
It's National Oat Milk Week and I'm celebrating with my friends over at Rise Brewing Co. using their Organic Chocolate Oatmilk to make this 5 ingredient dairy free ice cream!
Not only is this the one of the simplest summer recipes to make it also sneaks in an extra serving of veggies into your favorite summer snack by using avocados to make it extra creamy and dreamy!


Easily double or triple the recipe to serve a crowd. It's perfect for the kiddos because when it warms up it gets soft but never really "melts" making it much less of a mess for little mouths! Will definitely be serving this next weekend for Memorial Day!

Healthy Chocolate Oatmilk Ice Cream
Author: Sarah | April 19, 2021
Servings: 2-4
prep time: 15 minutes
freeze time: 3 hours - Overnight
total time: 8 hours
Ingredients: What You need to buy!
1 ripe avocado
1/4 c. Chocolate Oatmilk from Rise Brewing Co.
1/4 c. Cocoa Powder
3 tablespoons of Maple Syrup
Mini Chocolate Chips
Instructions: What You need to do!
Blend avocado, oatmilk, cocoa powder, and maple syrup until smooth.
Add a handful of chocolate chips and stir to combine
Freeze for 3 hours or up to overnight in a coverd bowl.
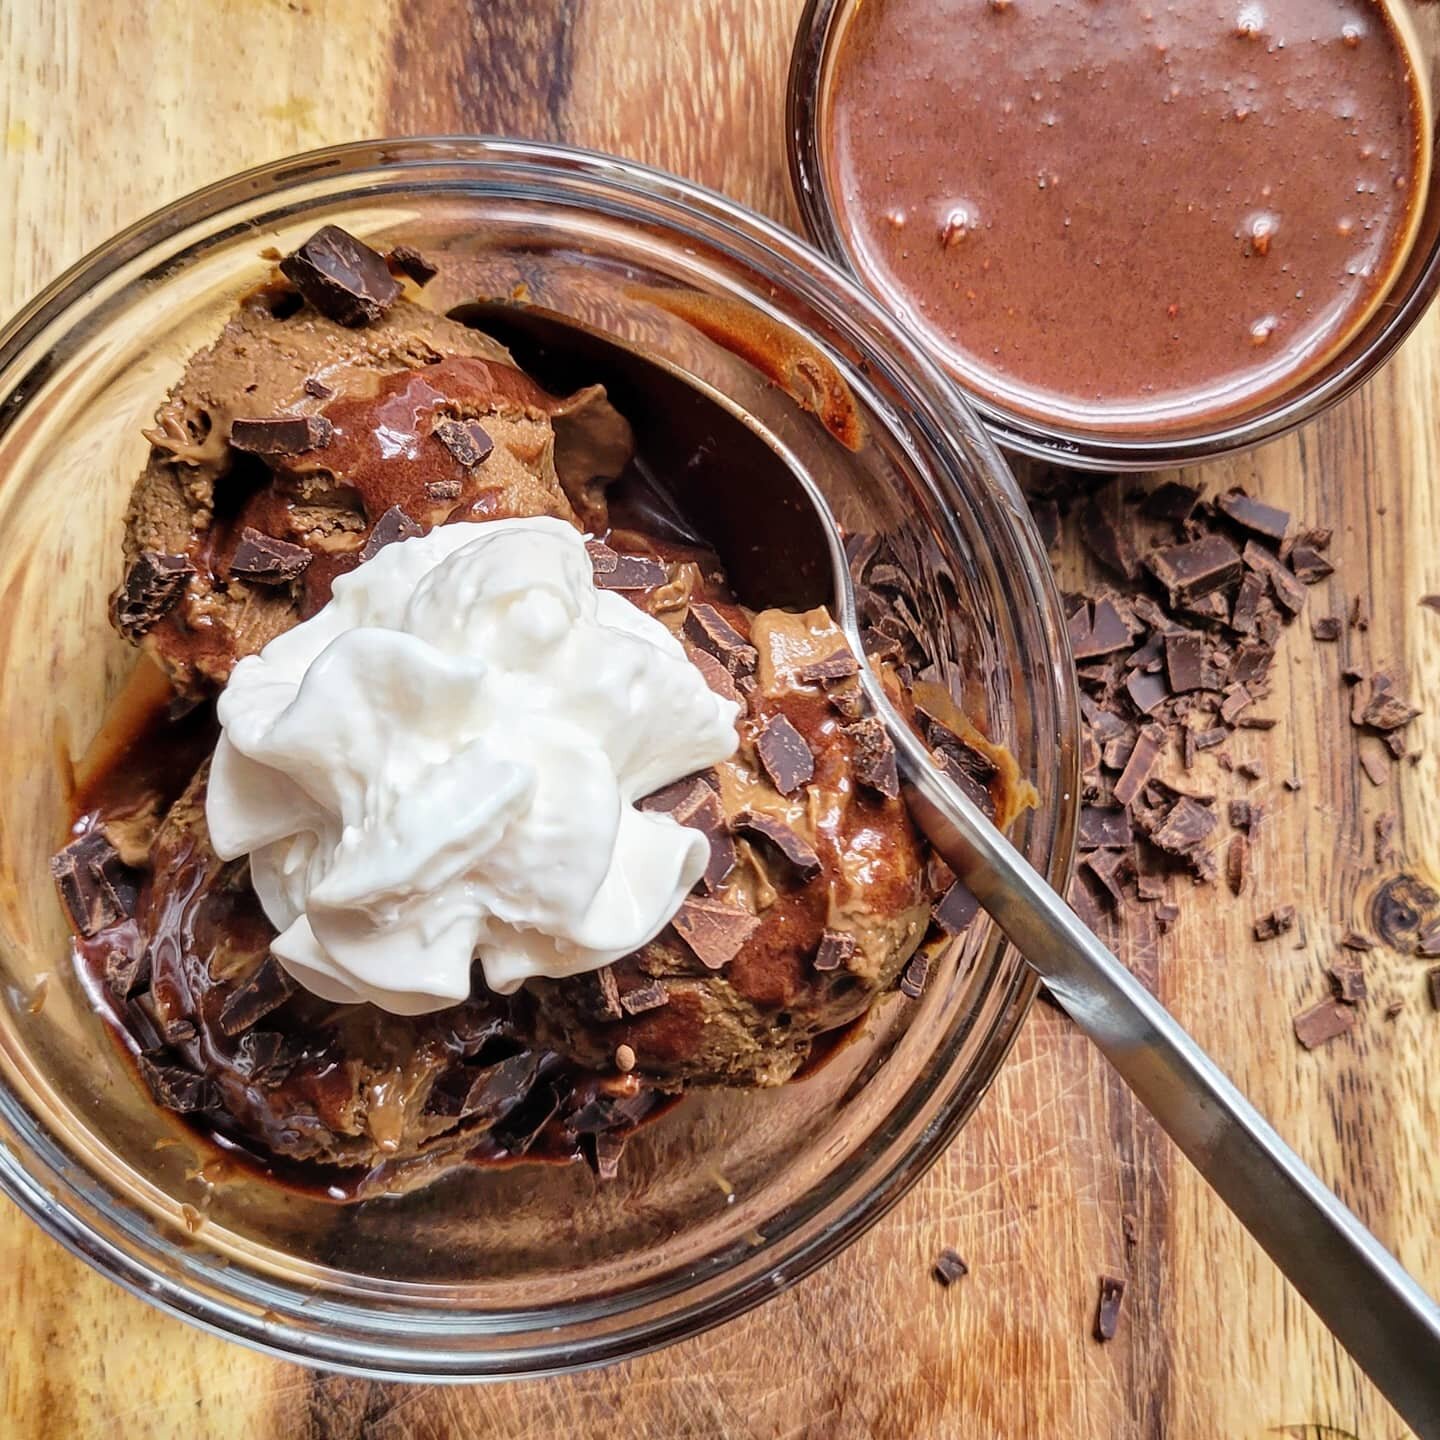
Serve with your favorite dairy free topping!
And…that’s it! See, I told you it was easy! Another of my favorite ways to enjoy this nice-cream is to make coffee floats! Simply use your favorite cold brew coffee, like the Nitro Original Black from the Rise Brewing Co. in place of root beer and top with a scoop of ice cream!
This recipe also happens to be the fastest and yummiest way to make dairy-free chocolate pudding! Simply skip the freezing step and refrigerate for about 30 minutes before serving! I really hope that you’ll try this Healthy Chocolate Oatmilk Ice Cream with Only 5 Ingredients this summer…and make sure to tag me when you do! @plantbasedgingr
Love, Light, and Lentils, my friends!
Sarah
Melt Proof Dairy Free Chocolate Ice Cream - Great for Kids this Summer PLUS Easy Vegan Chocolate Sauce!
This recipe just might be the perfect summer-time treat to help you beat the heat! Yes, you do freeze it, and yes the finished product has the texture of ice cream, but because the base in not milk and eggs, even when it does warm up a little it never really “melts” only softens into a “pudding-like” consistency but never gets melty, messy or drippy!
This recipe just might be the perfect summer-time treat to help you beat the heat, plus because it’s packed with heart-healthy avocado, (yes, I said avocado, but don’t worry, no one will ever know!) and has no processed sugar, it’s great for kiddos, too! Plus, I’ll give you my tip for the fastest and easiest vegan chocolate sauce to top it with! Yum!

Oh, the memories of summer I have, from childhood, bargaining with my parents for the biggest ice cream they would allow, only to have it melting, running, and dripping down my arm, staining my face, hands, and clothes only a few bites in…Yes, you do freeze it, and yes the finished product has the texture of ice cream, but because the base in not milk and eggs, even when it does warm up a little it never really “melts” only softens into a “pudding-like” consistency but never gets melty, messy or drippy!
What you are going to need to buy:
Avocados (roughly 1 per each 1-2 adult servings)
Cocoa Powder
Salt
Oat Milk - (The Chocolate Oat Milk from the Rise Brewing Co. is perfect for this recipe)
Maple Syrup
That’s it…I know, right? Just trust me, It’s total magic!
What you are going to need to do:
In a high powered blender add your avocados and 1/4 cup of oat milk and 1/4 cup of Maple Syrup, pulse until the mixture begins to smooth out. This will depend of how ripe your avocados are. Add a bit more oat milk, if needed.
From here you are going to add 1/4 cup of cocoa powder and a pinch of salt and blend until smooth.
Now, the measurments on this are going to depend on a couple of things…how much ice cream you are making, how ripe your avocados are, and how sweet, rich, or “chocolate-y” you want your ice cream.
NOTE: We are going to freeze this and like all food that gets eaten frozen, the cold dulls the flavor profile, so you will want the mixture to be slightly more intense (sweetness and chocolate flavor) than if you were eating it at room temperature!
Go slow and take your time, especially with the Oat Milk because if you get it too runny to start with you’re going to need to add another avocado!
Keep adding Oat Milk, Syrup, and Cocoa until you get the flavor profile you like AND you have reached a consistency that is like a slightly soft pudding, but NOT runny or liquid like yogurt.
When you have achieved both a taste and a texture you like, transfer the mixture to a freezer safe bowl, cover, and freeze until firm. (This will take several hours)
While the Ice Cream is freezing…whip up the vegan chocolate sauce.
This is so remarkable easy, I feel silly even typing up directions:
in a small mason jar, with a lid, shake together 1 cup of maple syrup and 1/4 cup of cocoa powder. Want a thicker, “dark chocolate” sauce? Just add more cocoa. That’s it. See, I told you it was easy!
Shaking the mixture together in a jar is so, so, so much easier than trying to mix it together, in a bowl, with a spoon, which is almost impossible because of how finely processed the cocoa tends to be. If you don’t have a mason jar, use a small Tupperware container, with a lid.
To Serve:
Scoop the ice cream into cones or bowls, as desired and top with the vegan chocolate sauce and other toppings, like your favorite vegan cream!
Enjoy!
The Ultimate Creamy Pesto with Avocado and Pistachios
Traditionally made with fresh basil, oil, and toasted pine nuts, this recipe swaps out the pine nuts for toasted pistachios, and adds avocado, for a nice, ultra-creamy texture, that is perfect for dressing pasta! Using the avocado means you can use less olive oil, and both the avocado and the pistachios are packed full with all kinds of “good fats” - no guilt required! Make a little extra because you’ll want to have some stashed in the fridge to top everything from your morning bagels to your vegetable soup!
Who doesn’t love pesto pasta? Not only is it a quick and easy week night dish when you’re basil is over-grown and out of control but it’s also a refreshing change of pace from all of the heavy and rich red-sauce pasta dishes that we’ve been eating all winter.
Traditionally made with fresh basil, oil, and toasted pine nuts, this recipe swaps out the pine nuts for toasted pistachios, and adds avocado, for a nice, ultra-creamy texture, that is perfect for dressing pasta! Using the avocado means you can use less olive oil, and both the avocado and the pistachios are packed full with all kinds of “good fats” - no guilt required! Make a little extra because you’ll want to have some stashed in the fridge to top everything from your morning bagels to your vegetable soup!


What you are going to need to buy:
Basil, like a bunch of it.
This really is one of those recipes that you’re more likely going to use the overgrown basil plant you have at home rather than but this much fresh basil at the store BUT if you’re going to buy it, you’ll need about 3 cups of fresh basil leaves for enough pesto to sauce 4 servings of pasta.
Fresh Parsley, (not required, but if you’re like me and your basil is over-grown, chances are your parsley is too…so I use this as an opportunity to use it up as well. All told you’re looking at about 3 cups of fresh herbs (lightly packed)
Pistachios, shelled (about 1 cup)
Avocado
1/2 cup of non-dairy Parmesan, (…or regular Parmesan, if that’s your thing. We love the vegan Parmesan Shreds from Follow Your Heart.)
Minced Garlic - (We like the jarred kind from Spice World)
Olive Oil
Cold Water
Splash of White Vinegar or Lemon Juice
Salt & Pepper, to taste
What you are going to need to do:
Start by toasting your pistachios. On the stove-top in a dry skillet or in oven, it’s your choice…just be careful not to burn them.
Into the blender goes your de-stemmed herbs and 1/2 cup of olive oil (or another neutral oil of your choice) and a splash of white vinegar or lemon juice, (maybe a tablespoon or two…)
Lightly pulse to begin to break up the herbs. Add 1 teaspoon of minced garlic (and a little of the oil that the garlic is packed in won’t hurt, either)
Add in your non-dairy parmesean and toasted pine nuts, and avocado and continue to pulse until mixture starts to come together. Once all the big chunks have processed run your blender on low, gently working up to a medium, and then high speed until pesto is creamy.
If too tick, you can add up to 1/4 cup of water, but add slowly or you’ll run the risk of thinning it out too much. It’s okay if this is on the thicker side because you can always use a bit of the pasta water, when you dress your pasta, to thin it out a bit and the starch in the pasta water will do a better job to help emulsify all the oils and the water, anyway.
After the pesto is fully blended, taste for seasoning and add salt and pepper. The cheese and the pistachios are both quite salty, so waiting until the end will ensure you don’t over-season.
Assembly:
Cook your preferred pasta per the packaged directions. I always like a noodle that’s going to catch or trap a bunch of sauce, instead of a plain fettuccine or spaghetti…but you use what you like!
Reserve 1/4 cup of pasta water in case you want to thin out the sauce a little.
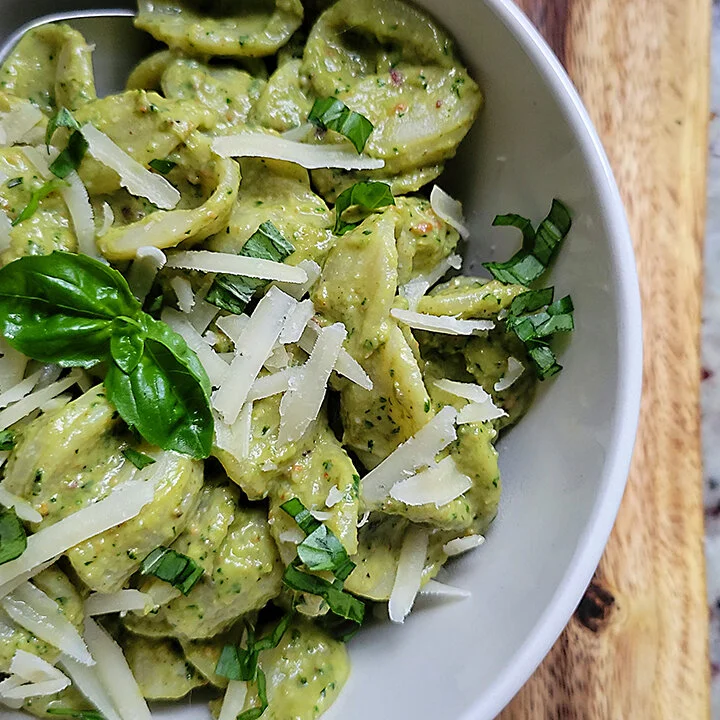
Do not drain pasta, simple ladle or scoop from water into serving bowls and top with pesto. Mix lightly to cover.
Garnish with additional herbs, cheese, and cracked black pepper. This dish is perfect for a crowd because you can make the pesto ahead of time and it looks way fancier on the plate than it is to make!
Enjoy!
The Best Fresh and Chunky Guacamole
If I had to choose between most restaurant and grocery store guac and no guac at all…I’d be on the anti-avocado train myself. Luckily, now you have this recipe! It’s so easy and delicious, I promise…you’ll never want to eat store-bought ever again. Perfect for a party, this recipe is sure to turn even the pickiest eaters green with avocado envy
I love avocados! Big surprise, I’m sure. Hang onto your hats…I also love guacamole! But, I know that a lot of people, (gasp)…do not. Perfect for a party, this recipe is sure to turn even the pickiest eaters green with avocado envy
I’m personally convinced that there are two reasons why some people don’t like avocados (and guacamole to be more specific): one, people who don’t eat them often, are a little intimidated about buying avocados, (ie: knowing when they are ripe) and two, because most of the “guacamole” that people have had at their restaurants and neighborhood backyard barbecues is basically green, processed, mushy baby-food! Yuck! If I had to choose between most restaurant and grocery store guac and no guac at all…I’d be on the anti-avocado train myself. Luckily, now you have this recipe! It’s so easy and delicious, I promise…you’ll never want to eat store-bought ever again.


What you are going to need to buy:
2 Ripe Avocados
1/2 Small Red Onion, diced
Handful of Cherry Tomatoes, diced
Garlic, minced - (our favorite is from Spice World!)
1 Fresh Lime
Salt & Pepper, to taste
Cilantro, if that’s your thing…
Mayo (Optional)
What you are going to need to do:
Open your avocado by slicing through the entire circumference of the fruit! Yes, It’s a fruit. I know…I know. It’s green. Look it up! Fruit, I promise. (Mind blown!)
Gently twist the two halves apart and with a large, sturdy kitchen knife, remove the pit. This is exponentially easier when the avocados are ripe.
Score the flesh of the fruit into a grid pattern and then scoop out the contents from the skins.
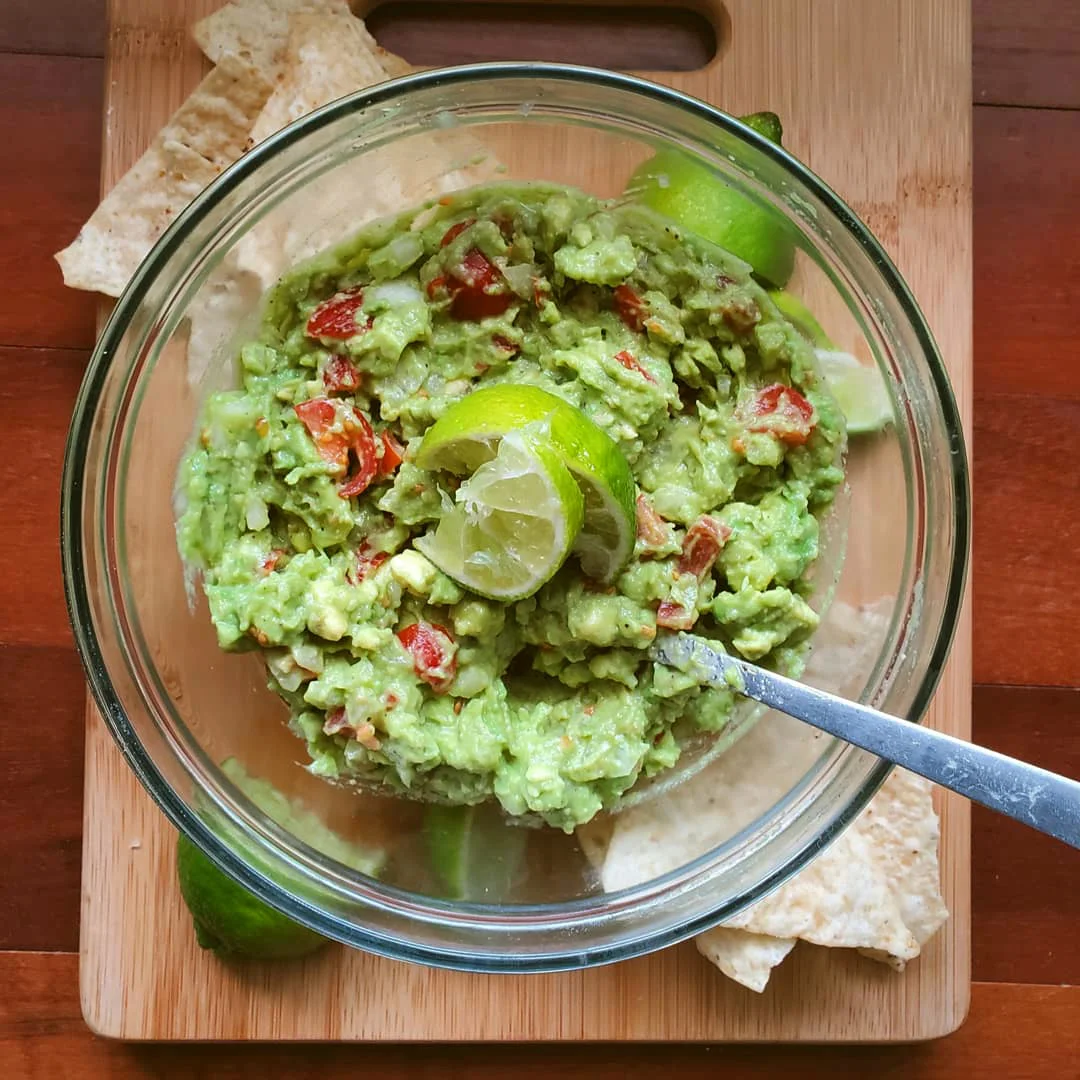
Into a mixing bowl combine the flash of two avocados, the diced onion, the diced tomatoes, (Using yellow and red tomatoes makes for an extra pretty dish, perfect for entertaining) and 1 -2 teaspoons of minced garlic.
Using the back of a fork, gently mash the mixture together to smooth out some of the lumps, being mindful not to turn your homemade guacamole Into the aforementioned baby-food. Personally, I like mine a little on the chunky side.
Squeeze in the contents of one small lime (Do not skimpy this…) and add salt and pepper to taste. If you’re a cilantro lover throw a handful of rough chopped cilantro into the bowl, give a final stir and serve!
That’s it! I told you it was easy!
Enjoy!
(A note about the Mayo: This can be either traditional or vegan mayo and can be a good trick to use if your avocados are not quite ripe enough to make your guacamole very creamy. Take 1 heaping tablespoon of mayo and add to the avocado when you are doing your initial “mash and mix” step. If you do add mayo, just know, it will flatten out the flavor a little and you will likely need a pinch more salt plus some more garlic and lime.)