


Curry Zucchini and Cauliflower Tacos
For a new spin on an old classic, why not try these Curry Zucchini Cauliflower Tacos? With the creamy and dreamy texture of the Curry Zucchini Spread you honestly won’t even miss the sour cream on these Cauliflower Tacos…the best part? The entire recipe comes together in just about 20 minutes!
Who doesn’t love tacos? For a new spin on an old classic, why not try these Curry Zucchini Cauliflower Tacos? This Curry Zucchini Spread from Growee Foods is so creamy and packed full of flavor it’s the perfect swap for sour cream, (plus loaded with a lot more flavor…) making these tacos the perfect dish for all your plant-based AND dairy-friends!


With the creamy and dreamy texture of the Curry Zucchini Spread you honestly won’t even miss the sour cream on these Cauliflower Tacos…the best part? The entire recipe comes together in just about 20 minutes!

Curry Zucchini and Cauliflower Tacos
Author: Sarah | April 24, 2021
Servings: 4
prep time: 10 minutes
cook time: 15 minutes
total time: 20 minutes
Ingredients: What You need to buy!
1 jar of Curry Zucchini Spread from Growee Foods
Soft Tortillas or Taco Shells
1 can of Refried Beans
1 cup of Roasted Corn
Fresh Radishes, sliced thin
Vegan Cheese - (I used feta)
Fresh Parsley or Cilantro
1 tsp. Paprika
1 tsp. Garlic Powder
1/2 tsp Salt
Pinch of Cayenne pepper
Non-Stick Cooking Spray
Instructions: What You need to do!
To start, preheat your oven to 400 degrees.
Break down your cauliflower into bite sized pieces and sprinkle with paprika, salt, garlic powder, and cayenne pepper, (if you like a little kick!)
Roast for 10-15 minutes or until the cauliflower has softened.
Then simply fill your tortillas with refried beans, roasted corn, radishes, and add the spicy cauliflower.
Top each taco with 1-2 tablespoons of the Curry Zucchini Spread from Growee Foods!
- Garnish with the vegan cheese and fresh herbs! The hardest part about this recipe is going to be trying to get these things closed! Better grab a fork, just in case!
What I really love about the spreads from Growee Foods is how they help you get all flavor with almost none of the prep! Fast food doesnt mean you need to sacrifice your nutrition! All of their plant-based blends are naturally rich in flavor and full of all the good stuff...free of all the bad! Real food with real flavor! Check out their website for more dinner inspiration!
Love, Light, and Lentils, my friends!
Sarah

Amish Broccoli Cheese Soup - Dairy Free
One of my favorites has always been broccoli cheese but it wasn’t until I lived up in Ohio’s Amish Country for about a decade that I ever had it made with any type of noodles or pasta in it!?! This dairy free version is definitely a deviation from what they served up there but, honestly, just as good...and bonus one more way to sneak a handful of kale from that huge bag you're trying to use up? Just me...hahah? But seriously, if you havent started adding finely chopped kale to your broccoli cheese soup...give it a try and thank me later!
Anyone else absolutely in love with #soupseason? One of my favorites has always been broccoli cheese but it wasn’t until I lived up in Ohio’s Amish Country for about a decade that I ever had it made with any type of noodles or pasta in it!?! Think little one inch pieces of angel hair type tiny strands...you can find it under the name fiedo spaghetti, or sometimes pastina.
Whatever it's called...those Amish got it right! It's a game changer for broccoli cheese soup and I haven’t ever made it any other way since!

This dairy free version is definitely a deviation from what they served up there but, honestly, just as good...and bonus one more way to sneak a handful of kale from that huge bag you're trying to use up? Just me...hahah? But seriously, if you havent started adding finely chopped kale to your broccoli cheese soup...give it a try and thank me later!
What you are going to need to buy:
2 tablespoons Dairy Free Butter
1 tablespoon Flour
2.5 cups Plant Milk
1 tablespoon Veggie Bouillon
1 package Dairy Free Shredded Cheddar
1/4 cup of Nutritional Yeast
1 tablespoon Yellow Mustard
1 cup of Fiedo Spaghetti
1.5 cup Fresh Broccoli
1 cup of Fresh Kale
1 teaspoon Garlic Powder
Salt and Pepper, to taste
What you are going to need to do:
In a medium pot, on low heat, melt about 2 tablespoons of butter and gently allow butter to brown, but not burn, because we’re going to make a roux.
Sprinkle 1 tablespoon of flower on top of the melted butter and whisk to combine. Cook mixture for about 30 seconds and then slowly add 2.5 cups of plant milk, whisking the entire time so that no lumps form. Bring to a boil and let boil about 30 seconds.
Stir in 1 tablespoon of veggie bouillon, 1 cup of water, and 1/4 cup of nutritional yeast.
Add 1 tablespoon of yellow mustard…don’t be afraid, just do it! (You can use brown mustard, if you like it!)
Reduce heat and add the cheddar shreds (yes, the whole bag), stirring to melt.
Add the fiedo spaghetti to the soup and simmer for 3 minutes.
Add the broccoli and kale.
Add salt and pepper, and garlic powder, to taste.
Prep Time: 10 minutes
Cook Time: 20 minutes
Serves: Four

Bruschetta Inspired Mini Flatbread Pizzas
There are some flavors that are just a winning combination no matter how you use them. One of my favorite combinations is tomato and sweet basil…and one of the quick and easy ways that I like to use them are on these bruschetta inspired mini flatbread pizzas!
There are some flavors that are just a winning combination no matter how you use them. One of my favorite combinations is tomato and sweet basil…and one of the quick and easy ways that I like to use them are on these bruschetta inspired mini flatbread pizzas!
The perfect dish for a quick lunch or dinner, particularly if/when you are either too tired to cook a full meal, after a long day, or simply not that hungry. The use of both fresh and sun-dried tomatoes on these little pizzas makes for a complex, tangy yet sweet, tomato flavor that tastes way more fancy than it actually is. The other great thing about this recipe is that it is super customizable and by changing up the toppings these little flatbreads are a convenient way to use up “extra” odds and ends that you may have hanging around in the back of the fridge.


What you are going to need to buy:
Your favorite brand of tortilla or, if you prefer, and can find it, some roti from your local bakery.
Sweet yellow onion, small, sliced
Sun Dried Tomatoes - (We like California Sundry brand)
Vegan Cream Cheese - (We love the plain cream cheese from Kite Hill Foods)
Vegan Parmesan - (We love the Follow Your Heart shredded Parmesan)
Minced Garlic - (we like these jarred options from Spice World!)
Vinegar (Apple Cider or Rice Wine)
Olive Oil
Cherry Tomatoes
Fresh Basil - (If your leaves are large, chop down to size)
Italian Seasonings
Fresh Basil
Salt and Black Pepper
Balsamic Vinegar
What you are going to need to do:
Preheat oven to 350 degrees
In a small skillet, over medium low heat sauté your sliced onions, minced garlic and salt & pepper with some of the oil that the sun-dried tomatoes come packed in until the onions have turned translucent, and even taken on just a slight carmel color
Mix 1/4 cup of Vegan Cream Cheese with 1/4 Cup of Vegan Parmesan, a splash of vinegar and one teaspoon of minced garlic. Add salt, pepper, and Italian seasonings, to taste.
A note about cheese: The above mixtute is a version of a soft, spreadable cheese that I use a lot for a lot of different recipes. If you are not interested in making these little pizzas vegan, then feel free to use a low moisture mozzarella or even a feta blend.
Slice 3 or 4 cherry tomatoes, per pizza, into little round medallions lightly sprinkle with salt.
On a large cookie sheet lay out your tortillas or roti trying not to overlap the edges and lightly brush the tops with olive oil.
Begin with a light layer of cooked onions and then, in 1/2 teaspoon size dollops, spoon your cheese mixture on top, being careful to evenly distribute onto the entire tortilla.
Add sun-dried tomatoes, as well as fresh tomatoes, across the top of the flatbread.
Now, at this point I like to sprinkle some fresh basil onto the flatbreads. This basil is going to dehydrate and crisp up in the oven, so you don’t want to use it all but the crunchy and almost roasted flavor that is brought out by cooking some of the basil under the broiler is really nice. Again, don’t use all of your basil at this point because you will still want to add some fresh leaves to the top of the pizzas once they have come out of the oven.
Bake at 350 degrees for about 5 or 6 minutes and then turn on your broil setting and let the pizzas go another 2 or 3 minutes. Make sure to check about every 30 to 45 seconds once you have them under the broiler because if you are not careful they can burn…and quickly. The goal here is to crisp up the edges of the tortilla and melt all of the cheese.
Remove from oven and sprinkle with reserved basil leaves and just about 1/2 teaspoon of balsamic vinegar before serving. Enjoy!

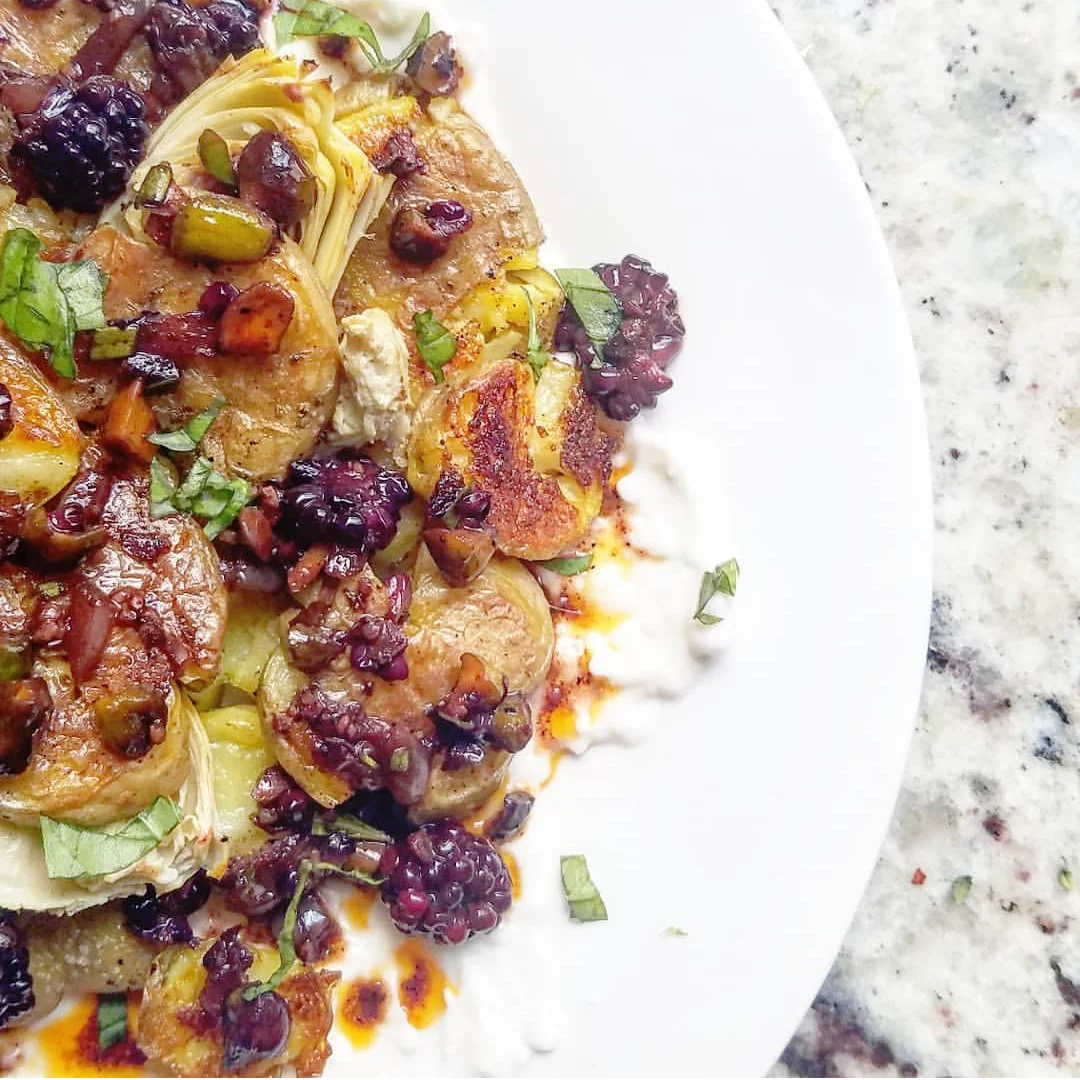
Crispy Smashed Potatoes and Roasted Artichokes with a Spicy Pistachio Berry Chutney
The variety of flavors and textures come together to create the perfect side dish for summer entertaining and BONUS: it ends up looking way, way, more fancy than it actually is, and so do you, by association. The goal is for the exterior to get good and crispy while the inside maintains a soft and creamy texture. This recipe does have a couple steps, but nothing about it is difficult. Start to finish you’re still looking at about 30-35 minutes.
It’s hard to explain just how good this dish really is. I know…I know what you’re thinking. Just by reading the name of this recipe you are already suspicious, but trust me! The variety of flavors and textures come together to create the perfect side dish for summer entertaining and BONUS: it ends up looking way, way, more fancy than it actually is, and so do you, by association.
Oh, potatoes…how we love thee: fried, mashed, and in this case, smashed. But, all potatoes are not created equal and for this recipe you are going to want to look for a nice baby potato that is pretty uniform in size and shape and that isn’t waxy. The goal is for the exterior to get good and crispy while the inside maintains a soft and creamy texture. This recipe does have a couple steps, but nothing about it is difficult. Start to finish you’re still looking at about 30-35 minutes.


What you are going to need to buy:
Small Baby Potatoes. (My favorites for this recipe are Baby Honey Golds)
Veggie Stock or Bouillon – (I like the “Not Beef Bouillon” by Edward and Sons)
Olive Oil
Artichoke Hearts (One can, halves or quarters)
Minced Garlic - (we like these jarred options from Spice World!)
Small Onion, diced
Salt
Paprika
Chili Powder
Agave Syrup (or you can substitute Maple Syrup or even brown sugar, if you prefer)
Pistachios, half cup, lightly chopped (or you can substitute walnuts or pecans)
Handful of black berries (or you can substitute raisins, dried cranberries, or even cherries)
Fresh Herbs (I used rosemary and basil but parsley or mint would also work well)
Sour Cream (Non-Dairy, or otherwise - of course by now you know I’m a Tofutti gal!)
What you are going to need to do:
To begin, in a medium sized pot cover your baby potatoes with water or stock and bring to a boil. Depending on the size of your potatoes they will need to boil for 5-8 minutes until they are “fork tender.”
Drain and let sit for 1-2 minutes to make sure that all of the water has drained/evaporated off. The more the dry the potatoes are at this point, the better that they will crisp up in the oven when we smash and bake them.
Preheat your over to 425. At this point, if your artichokes are not cut into quarters, quickly drain them and chop them to size, retaining about 2-3 tablespoons of the brine that they are packed in.
Transfer the potatoes and the artichokes to a heavy bottomed baking sheet and using the bottom of a mug or measuring cup, gently smash each small potato until it cracks. Remember that these are “smashed” potatoes, not mashed…Don’t get too crazy, here! Drizzle liberty with olive oil and salt, making sure that all of the cracks and crevices in the potatoes get a little oil to ensure good browning and crispiness.
Bake for about 15-20 minutes, checking halfway through. Optionally, you may flip the potatoes halfway through for browning on both sides. Do this gently, or the “smashed” bits may fall apart.
While the potatoes are crisping up in the over we need to make the chutney. Is chutney really the right word for this…maybe not, but once you taste how good it is…you won’t care!
In a medium saucepan toast your Pistachios on medium heat until they have taken on a little color and become fragrant. Add to the toasted nuts 2-3 tablespoons of olive oil, the small diced onion and 2 cloves of mined garlic. Saute’ until the onions are soft and translucent. Keep an eye on this! Do not burn your garlic.
Add in the reserved couple of tablespoons of the artichoke brine, paprika and and chili powder (to taste…but really don’t be a wimp!) and the Agave syrup, or your preferred sweetener, about 1 tablespoon.
Dice your berries (or preferred fruit) into small pieces and, after turning off the heat, add the fruit and stir well to incorporate. The residual heat will cook/warm/break down the berries, but we don’t want them to totally dissolve into the sauce. Stir occasionally. Taste for seasoning and add more spice or more sweetener depending on your liking.
Check on your potatoes. If golden and crispy on both sides, remove from oven and let sit on the pan for 1 minute.
To serve: Spread a thin layer of sour cream (Obviously, we used vegan sour cream) but use what you like…to a plate or serving dish. Arrange smashed potatoes and artichokes on top of the sour cream and drizzle with chutney. Garnish with fresh herbs or your choice!
Enjoy!

Impossible Patty Melt
These 100% Vegan Patty Melts, made with ground from Impossible Foods look a lot fancier than they really are…and actually make a great week night dinner…plus this happens to be THE dish if you’re looking to fool your meat-eating friends and family with your plant-based magic!
These 100% Vegan Patty Melts, made with ground from Impossible Foods look a lot fancier than they really are…and actually make a great week night dinner…plus this happens to be THE dish if you’re looking to fool your meat-eating friends and family with your plant-based magic!
If you’ve been plant based for awhile then you like have a favorite faux-burger brand that you like best! This recipe was made with the Impossible Ground, which we think browns/crusts up the best for a “smash-style” burger that you typically see in a patty melt…but having said that, use what you like, or what you’ve got in the freezer!


What you are going to need to buy:
Impossible Ground (or your favorite meatless ground alternative)
Sweet Onion
White Mushrooms, sliced
Olive Oil
Minced Garlic - (We like the jarred kind from Spice World)
Balsamic Vinegar - (We get ours from this great little place here in Central Florida called The Ancient Olive)
Your Favorite Bread , Vegan or Otherwise - (I used Sara Lee® Artesano™ Bakery Bread)
Non-Dairy Cheese - (We used THIS CHEESE from Field Roast…melts like a dream!)
Liquid Smoke
Salt and Pepper
Onion Powder
Paprika
Non-Dairy Butter - ( We used Earth Balance)
What you are going to need to do:
Start by peeling and slicing your onion and, using a little olive oil on medium heat, cook with your mushrooms and garlic, adding onion powder, and a splash of balsamic vinegar. Cook until mushrooms and onions are soft.
Combine your Impossible Ground with a teaspoon of Liquid Smoke, a teaspoon of Pickapeppa Sauce, a pinch of paprika and salt/pepper, to taste. Mix well and form into patties. Depending on your preferred size you should be able to get 3 or 4 patties from one package of ground.
Using a little Earth Balance Vegan Butter in your skillet, fry up your patties on medium heat…remember they should be a little thinner than a hamburger. I also like to kinda shape the patty to fit the bread I am using.
After you flip the patty to cook on the second side, load up the top with your onions and mushrooms.
Place your sliced non-dairy cheese on your top piece of bread and pop into the microwave for about 10 seconds. Place your bread, cheese side down, onto your onion and mushroom covered patties and flip the entire affair so that now your bread can griddle on the skillet.
Repeat the bread, cheese, microwave routine for the other piece and place that on top, flipping when the first side is golden brown so that the second side can griddle.
Slice, serve, and enjoy!
A quick note about Vegan Cheese: We all know it takes higher heat to melt vegan cheese! When I am making sandwiches that require my cheese to melt, I always lay out my vegan cheese on the bread and pop it into the microwave for about 10 seconds. and this just gives it a jump start to ensure a good melt without burning your sandwich!
Enjoy!